
© Original recipe by Fork & Flourish ©
🔥 Addictive Cheeseburger Sliders Party Snack: The Ultimate Burgers Party Food! 🍔
1. Introduction
If you’re searching for the perfect crowd-pleasing appetizer or a fun finger food for your next gathering, then cheeseburger sliders are your answer. These mini cheeseburgers are packed with juicy beef, melted cheese, and flavorful toppings all tucked into soft, toasted buns. The aroma alone will make your guests eager to dig in. Making delicious cheeseburger bites has never been easier or more satisfying, especially when you master this addictive recipe that combines classic flavors with a fun, bite-sized twist.
2. Why You’ll Love This Recipe
- Ready in 30 minutes — perfect for last-minute parties or weeknight bites.
- One-pan or oven-friendly — simplifies cleanup, so you spend more time enjoying.
- Versatile toppings — customize with your favorite cheese, veggies, or condiments.
- Kid-friendly and crowd-approved — a guaranteed hit for all ages.
3. Ingredient Notes
To make the best cheeseburger sliders, quality ingredients matter. Opt for a reliable air fryer or oven to get that perfect toasted bun, while high-quality ground beef (preferably 80/20) ensures juicy, flavorful bites. For cheese, classic American or sharp cheddar lends that authentic cheeseburger flavor. Fresh toppings—like crisp lettuce, ripe tomatoes, and tangy pickles—add freshness and texture. Use good-quality buns, toasted lightly to add a slight crunch which contrasts beautifully with the melted cheese. When possible, buy organic or pasture-raised beef for richer flavor and better nutrition.
4. Kitchen Tools You Need
Enhance your cheeseburger slider-making experience with some handy tools. For seamless prep and cooking, check out the Compact 6-in-1 Digital Air Fryer for quick, crispy results without deep frying. A T-fal 14-Piece Nonstick Cookware Set guarantees easy-to-clean surfaces and versatile cooking options, perfect for browning and warming ingredients. For baking buns or cheese melts, consider the Ninja 12-in-1 Smart Double Oven that can handle multiple tasks efficiently, saving you time and energy in the kitchen.
5. How to Make Addictive Cheeseburger Sliders Party Snack
Prepare the Beef Patties
Start by gently mixing ground beef with salt, pepper, and a dash of garlic powder. Form small, flat patties (about 2 inches in diameter). Your kitchen will fill with the aroma of seasoned beef as you cook — either on a skillet or in the air fryer until browned and cooked through. Look for a seared exterior with a juicy interior, about 3-4 minutes per side.
Toast the Buns
While the beef cooks, slice the buns and lightly toast them until golden brown. This step adds a satisfying crunch and prevents the bread from becoming soggy from the toppings or condiments. A brief toast in the oven or air fryer will achieve this beautifully.
Assemble the Sliders
Place the cooked beef on the bottom half of each bun. Add a slice of cheese, allowing it to melt slightly from the warm beef. Top with your favorite fresh toppings—think crisp lettuce, juicy tomato slices, and crunchy pickles. Finish with the top bun, and if desired, secure with a toothpick.
Final Tips
If you want cheesy, gooey sliders, melt extra cheese on top in the microwave or oven for a few seconds. Serve immediately for maximum flavor and freshness. Want a spicy kick? Add jalapeños or your favorite hot sauce. These sliders are as customizable as they are delicious.
6. Expert Tips for Success
To ensure your cheeseburger sliders turn out perfectly, avoid overworking the ground beef, which can lead to dense patties. Keep the patties thin—around 1/4 inch—so they cook quickly and stay juicy. When cooking in an air fryer, preheat it for even results and avoid overcrowding to get crispy edges. Lastly, don’t skip the toasting step; it adds texture and helps hold the sliders together.
7. Variations & Substitutions
- Vegetarian version: Use seasoned black beans or plant-based burger patties instead of beef for a delicious meat-free alternative.
- Lactose-free: Swap regular cheese for dairy-free or vegan cheese options.
- Low-carb: Skip the buns and serve the cheesy beef patties over lettuce leaves or keto-friendly bread.
8. Storage & Reheating
Store any leftovers in an airtight container in the refrigerator for up to 2 days. To reheat, microwave on medium heat or warm in an oven or air fryer until the cheese melts again and the sliders are heated through. For best results, reheat buns separately to maintain their texture.
9. FAQ
Can I make cheeseburger sliders ahead of time?
Absolutely! Assemble the sliders, wrap them tightly in plastic wrap, and store in the fridge. Reheat in the oven or air fryer before serving for that just-made freshness.
What cheese works best in cheeseburger sliders?
American, cheddar, Swiss, or pepper jack all work well. Choose based on your flavor preference—melty cheese is essential for that gooey, satisfying bite.
How do I prevent the sliders from becoming soggy?
Toast the buns well, don’t overload toppings, and serve immediately after assembling. Lightly toasting the buns helps them hold up against sauces and juicy toppings.
Are cheeseburger sliders suitable for kids?
Yes! Their bite-sized nature makes them perfect for little hands and big appetites alike. Plus, you can customize toppings to suit their tastes.
10. Conclusion
Cheeseburger sliders are the ultimate party snack — easy to make, customizable, and irresistibly tasty. Whether you’re hosting a game day, birthday party, or casual get-together, these mini cheeseburgers will steal the show. With just a few simple ingredients and some helpful tips, you can create addictive bites that everyone will love. Get ready to impress your guests and enjoy every savory, cheesy moment! Don’t forget to explore more fun kitchen gadgets and tools at Amazon to elevate your cooking experience.
Print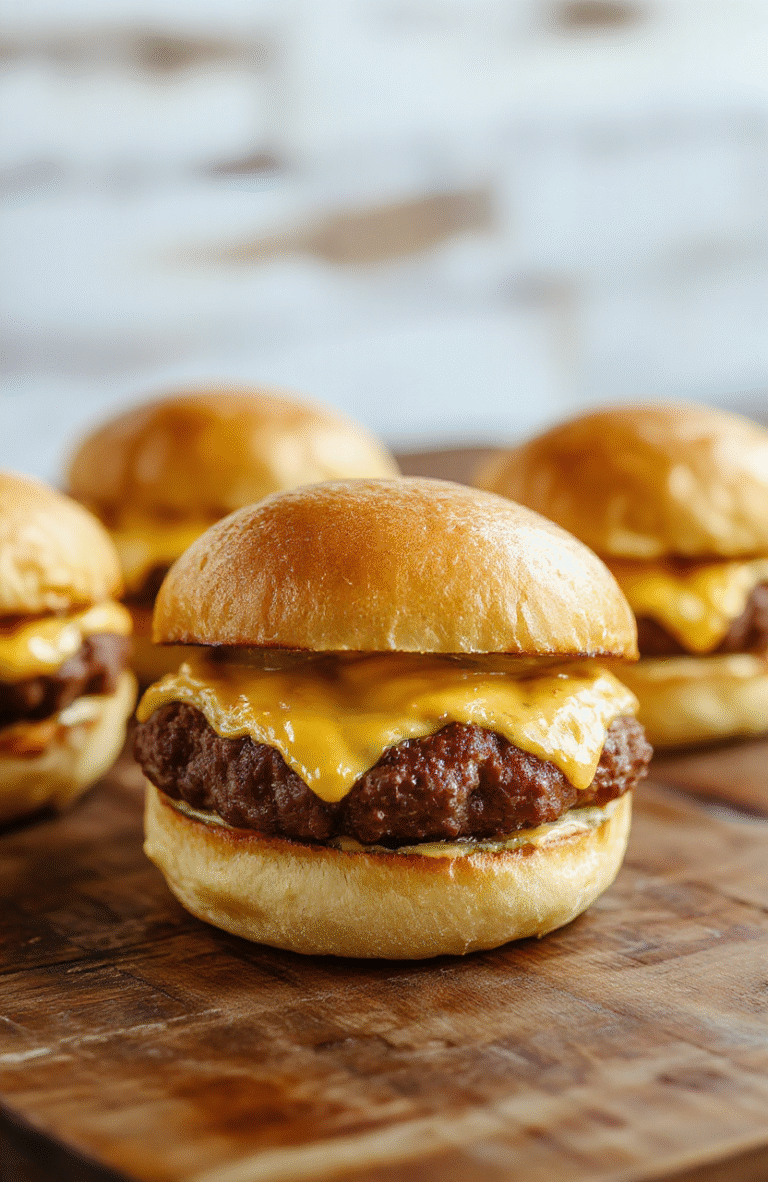
Addictive Cheeseburger Sliders Party Snack
Delicious mini cheeseburgers with melted cheese, crispy pickles, fresh greens, served on soft slider buns, perfect for parties.
- Total Time: 25 minutes
- Yield: 24 sliders
Ingredients
- 24 mini slider buns
- 1 lb (450g) ground beef
- 8 slices cheddar cheese
- 1/4 cup diced pickles
- 1/4 cup chopped lettuce
- 2 tbsp ketchup
- 2 tbsp mustard
- Salt and pepper to taste
Instructions
- Preheat a skillet over medium-high heat.
- Form the ground beef into 24 small patties, season with salt and pepper.
- Cook the patties for 3-4 minutes on each side until browned and cooked through.
- Place a slice of cheddar cheese on each patty during the last minute of cooking to melt.
- Slice the slider buns in half and toast lightly if desired.
- Assemble sliders by adding a beef patty, pickles, lettuce, ketchup, and mustard onto the buns, then top with the other half.
- Serve warm or at room temperature as a party snack.
Notes
- You can prepare the patties ahead of time and assemble just before serving.
- For extra flavor, add onions or bacon slices.
- Prep Time: 10 minutes
- Cook Time: 15 minutes
- Method: Pan-fried
- Cuisine: American
- Diet: Dairy, Meat
Nutrition
- Serving Size: 1 slider
- Calories: 150 Kcal
- Sugar: 2g
- Sodium: 250mg
- Fat: 9g
- Saturated Fat: 4g
- Unsaturated Fat: 5g
- Trans Fat: 0g
- Carbohydrates: 13g
- Fiber: 1g
- Protein: 8g
- Cholesterol: 30mg
