
© Original Recipe By Sweets & Wonders ©
✨ Chewy Chocolate Thumbprint Cookies – Fudgy Easy Dessert 🍫
1. Introduction
If you love rich, indulgent chocolate treats, then these chocolate thumbprint cookies are about to become your new favorite dessert. Imagine biting into a perfectly chewy cookie with a crisp exterior, topped with a luscious fudgy filling that melts in your mouth. These chocolate thumbprint cookies are not only simple to make but also deliver a sensory explosion of chocolate flavor in every bite. Whether you’re preparing for a special occasion or just craving a decadent snack, this recipe offers a delightful way to satisfy your sweet tooth.
2. Why You’ll Love This Recipe
- Ready in under 30 minutes — perfect for quick cravings.
- A one-bowl, fuss-free recipe that’s great for beginners.
- Chewy cookies with a rich, fudgy center—crispy on the outside, gooey on the inside.
- A versatile dessert suitable for any chocolate lover.
3. Ingredient Notes
To create these divine fudgy chocolate treats, using high-quality ingredients makes all the difference. I recommend using premium cocoa powder like Breville Nespresso Vertuo Creatista Espresso & Coffee Maker for a deep, aromatic chocolate flavor. Opt for unsalted butter to ensure the right balance of richness, and soft, high-quality chocolate for the filling. For a more intense fudgy center, consider adding a touch of espresso powder or sea salt to enhance the chocolate taste.
4. Kitchen Tools You Need
For perfect chocolate thumbprint cookies, having the right tools makes baking easier and more enjoyable. A T-fal 14-Piece Hard Anodized Nonstick Cookware Set ensures your cookies won’t stick and makes cleanup a breeze. A high-quality silicone baking mat, like the ones available here, helps achieve even baking and prevents burning. Don’t forget a good cookie scoop to ensure uniform size—this step is crucial for even baking and aesthetic appeal.
5. How to Make Chewy Chocolate Thumbprint Cookies
Preparing the Dough
Start by creaming butter and sugar until it’s fluffy and pale, releasing a sweet, buttery aroma. Mix in egg yolk and vanilla until well combined. Sift together dry ingredients—cocoa powder, flour, salt, and baking soda—and gradually add them into the wet mixture. The dough will be thick and moist, with a rich chocolate scent wafting up as you mix. Chill the dough for about 15 minutes to make it easier to handle.
Shaping the Cookies
Roll the chilled dough into 1-inch balls, then place them on a prepared baking sheet lined with a silicone mat or parchment paper. Use your thumb or the back of a small spoon to make an indentation in the center of each cookie—these will hold the fudgy filling later. Expect the cookies to be slightly cracked on the surface but still soft and chewy in the middle.
Baking & Filling
Bake the cookies at 350°F (175°C) for about 10-12 minutes until set. The edges should be just barely firm, and the smell of baked chocolate will fill your kitchen. While they’re still warm, gently press a small piece of chocolate or a dollop of fudge into each indentation. The residual heat will melt the chocolate, creating a shiny, fudgy center that’s irresistibly smooth. Allow the cookies to cool completely before serving.
6. Expert Tips for Success
- Chill your dough before shaping—it makes handling easier and results in a better texture.
- If you want a more pronounced fudgy center, add a small spoonful of chocolate ganache into the thumbprint before baking.
- Ensure cookies are evenly spaced on the baking sheet for uniform baking. Use a Compact 6-in-1 Digital Air Fryer or other tools to bake small batches with precision.
- Let the cookies cool fully before adding the melted chocolate filling to prevent melting and spreading.
7. Variations & Substitutions
If you’re looking to customize these cookies, consider adding chopped nuts or sprinkles on top of the chocolate filling. For dairy-free options, swap butter with coconut oil and use dairy-free chocolate. To make them gluten-free, replace the regular flour with a 1:1 gluten-free baking flour blend.
8. Storage & Reheating
Stored in an airtight container at room temperature, these chewy cookies stay fresh for up to 3 days. For longer storage, refrigerate or freeze them. To enjoy later, reheat briefly in a warm oven or microwave just until the chocolate melts again for a fresh, fudgy experience.
9. FAQ
Can I make these cookies ahead of time?
Absolutely. Prepare the dough and keep it refrigerated for up to 24 hours before baking. This allows the flavors to meld and offers convenience.
What filling can I use for the thumbprints?
Chocolate ganache, peanut butter, caramel, or fruit preserves all work wonderfully. For a fudgy vibe, stick with melted chocolate or fudge.
Are these cookies suitable for gluten-free diets?
Yes, with a simple substitution of gluten-free flour and ensure your other ingredients are gluten-free.
Can I freeze the dough or baked cookies?
Yes, you can freeze the unbaked dough for up to 2 months. Baked cookies can be frozen individually then stored together in an airtight container for up to a month.
10. Conclusion
These chewy chocolate thumbprint cookies are a decadent, fudgy dessert that beautifully combines crispy exterior with a luscious chocolate center. Perfect for chocolate enthusiasts and easy enough to whip up on a weekday or serve at a party. With their irresistible texture and rich flavor, they’re sure to become a crowd favorite. Happy baking!
Print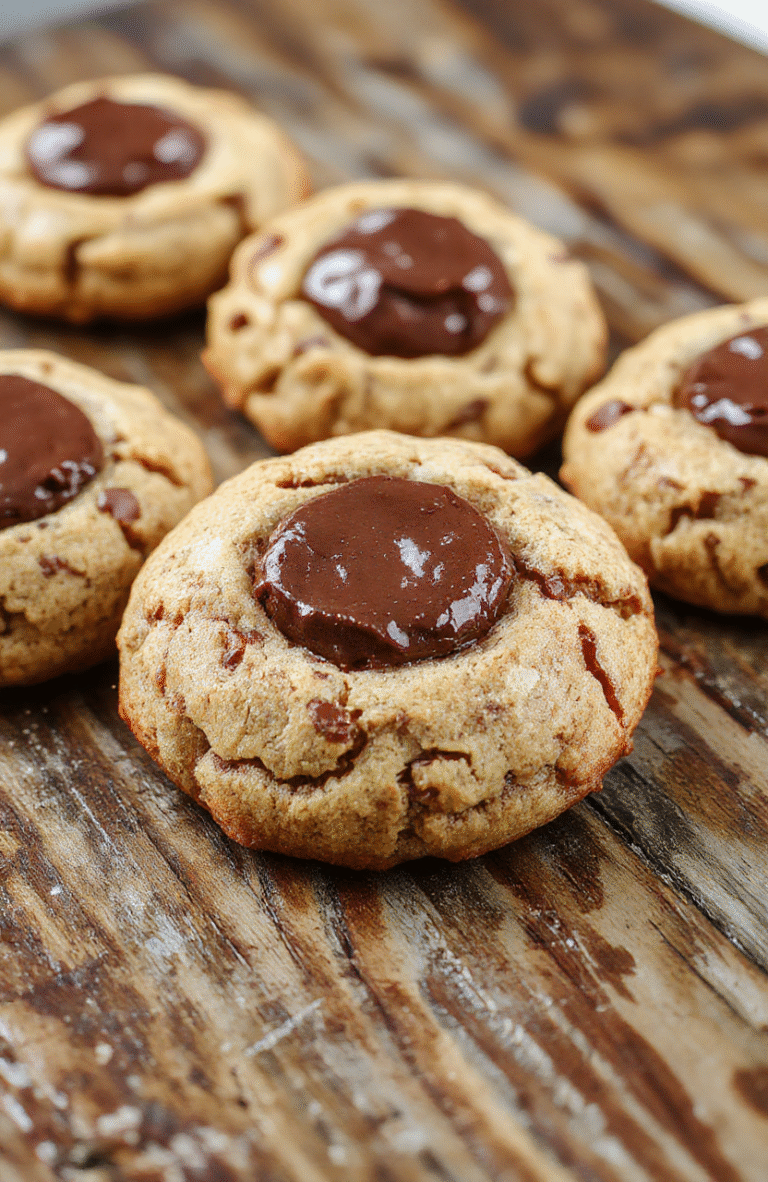
Chewy Chocolate Thumbprint Cookies – Fudgy Easy Dessert
A simple recipe for chewy chocolate thumbprint cookies with rich chocolate filling, perfect for a quick dessert.
- Total Time: 45 minutes
- Yield: 24 cookies
Ingredients
- 1 cup unsalted butter, softened
- 1/2 cup granulated sugar
- 1/2 cup brown sugar
- 2 cups all-purpose flour
- 1/4 cup cocoa powder
- 1 teaspoon vanilla extract
- 1/2 teaspoon salt
- 1/2 cup chocolate chips, melted
Instructions
- Preheat oven to 350°F (175°C). Line baking sheets with parchment paper.
- In a bowl, cream together butter, granulated sugar, and brown sugar until light and fluffy.
- Add vanilla extract and mix well.
- Gradually add flour, cocoa powder, and salt; mix until combined.
- Chill the dough for 30 minutes.
- Roll into 1-inch balls and place on prepared baking sheets.
- Make an indent in each ball using your thumb or a spoon, then fill with melted chocolate chips.
Notes
- Chill dough for best results and easier handling.
- Fill the thumbprints generously with melted chocolate for a fudgier center.
- Prep Time: 15 minutes
- Cook Time: 12 minutes
- Method: Baking
- Cuisine: American
- Diet: Vegetarian
Nutrition
- Serving Size: 1 cookie
- Calories: 120 Kcal
- Sugar: 8g
- Sodium: 50mg
- Fat: 7g
- Saturated Fat: 4g
- Unsaturated Fat: 3g
- Trans Fat: 0g
- Carbohydrates: 14g
- Fiber: 1g
- Protein: 2g
- Cholesterol: 10mg
