
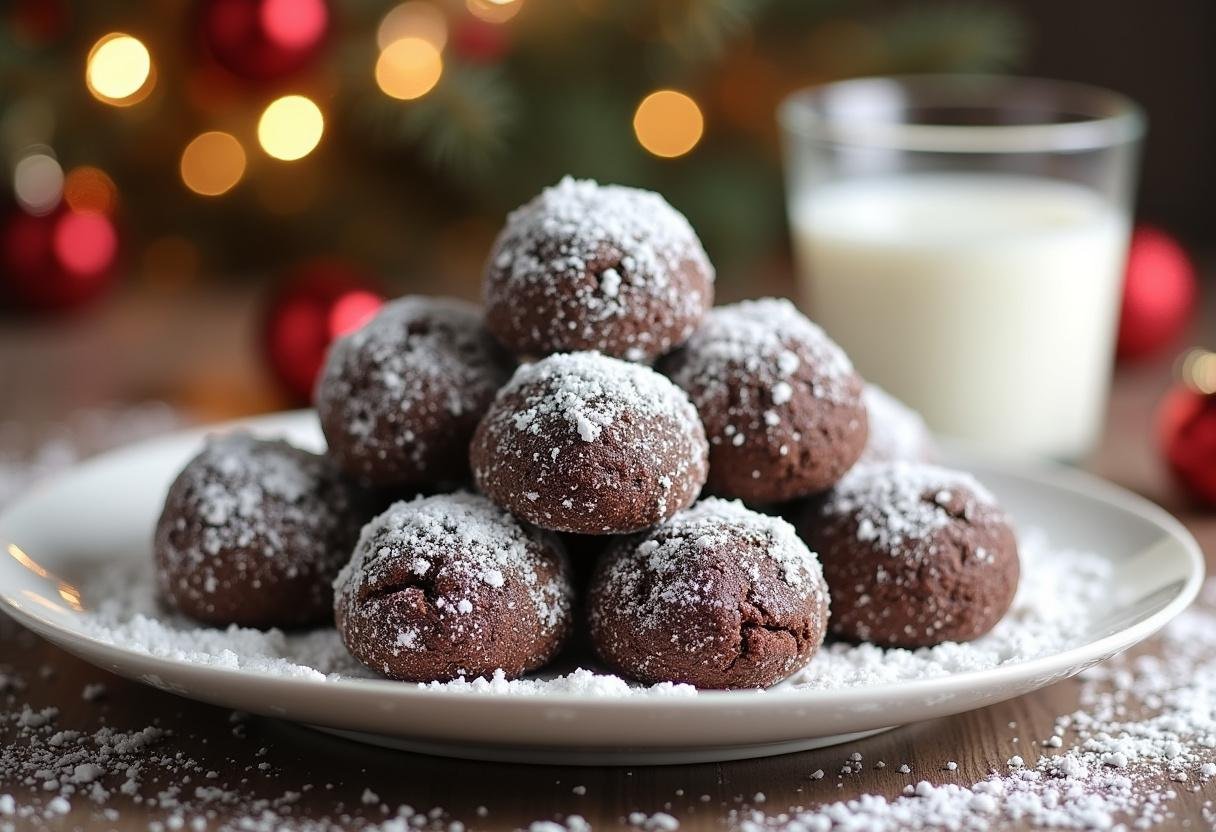
Chocolate Snowball Cookies: Melt-in-Your-Mouth Bliss Coated in Sweet Powdered Snow ❄️🍫✨
1. Introduction
Chocolate Snowball Cookies are the perfect festive treat that combines rich cocoa flavors with a delicate, melt-in-your-mouth texture. These bite-sized delights, also known as Russian tea cakes or Mexican wedding cookies, get a delicious chocolate twist that makes them irresistible. Whether you’re preparing for holiday gatherings, cookie exchanges, or simply craving a sweet treat with your afternoon tea, this chocolate snowball cookies recipe is foolproof and delivers perfect results every time.
What makes these cookies special is their beautiful snowy appearance and the wonderful contrast between the crisp exterior and tender interior. The powdered sugar coating gives them that magical winter wonderland look while adding just the right amount of sweetness. If you’re looking for more holiday cookie inspiration, check out these gorgeous chocolate snowball cookie variations that might spark your creativity.
2. Ingredients
Gathering quality ingredients is the first step to baking perfect chocolate snowball cookies. Here’s what you’ll need:
- 1 cup unsalted butter, softened – The foundation of our cookies, providing richness and that melt-in-your-mouth texture
- ½ cup powdered sugar, plus extra for dusting – Creates a tender crumb and gives that snowy coating
- 1 teaspoon vanilla extract – Enhances all the flavors in the cookies
- 2 cups all-purpose flour – The structure of our cookies
- ¼ cup unsweetened cocoa powder – For that deep chocolate flavor we love
- ¼ teaspoon salt – Balances the sweetness and enhances flavors
- 1 cup finely chopped walnuts or pecans (optional) – Adds wonderful texture and nutty flavor
For those looking to explore more cookie recipes, you might enjoy browsing through mealsmom.com for additional baking inspiration.
3. Step-by-Step Instructions
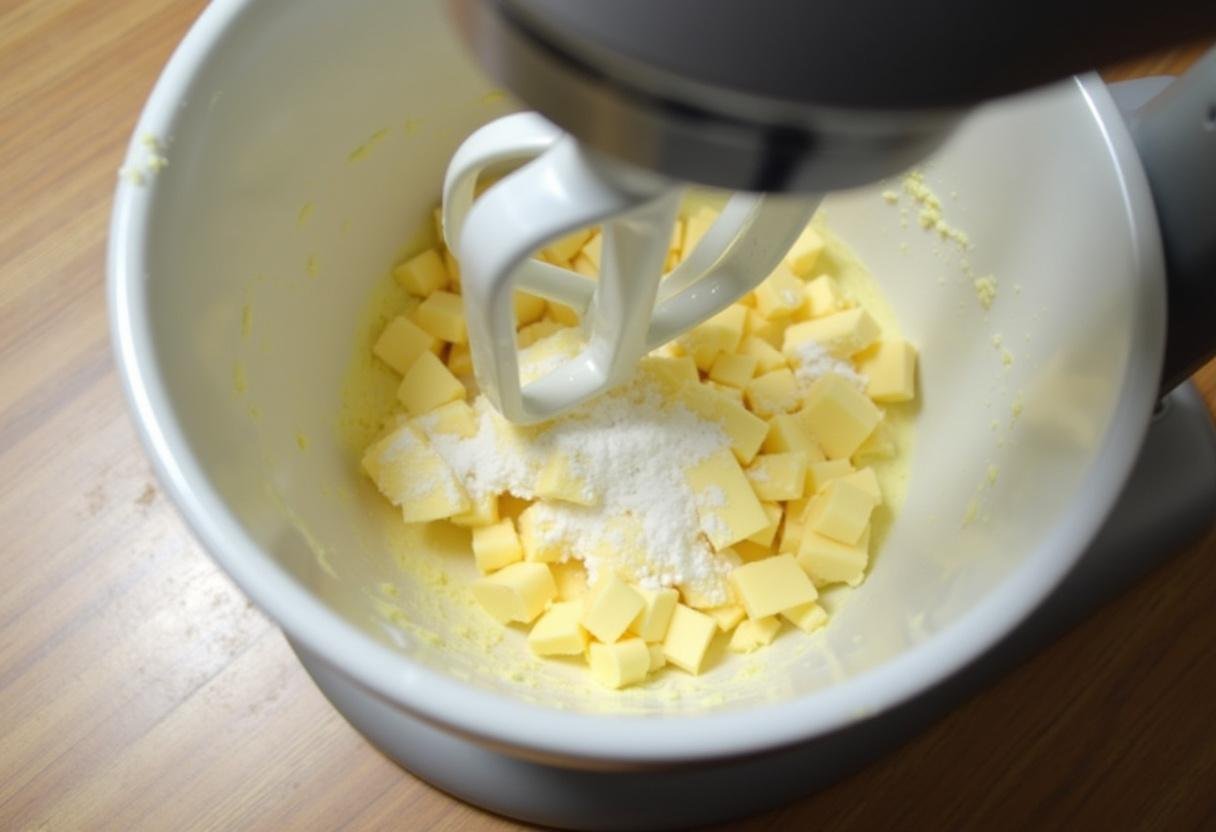
Step 1: Cream the Butter and Sugar
In a large mixing bowl, use an electric mixer to beat the softened butter and powdered sugar together for about 3-4 minutes until the mixture becomes light, fluffy, and almost white in color. This crucial step incorporates air into the dough, ensuring your chocolate snowball cookies have that perfect tender texture we’re aiming for. Make sure your butter is at room temperature (about 65°F) – it should give slightly when pressed but not be oily.
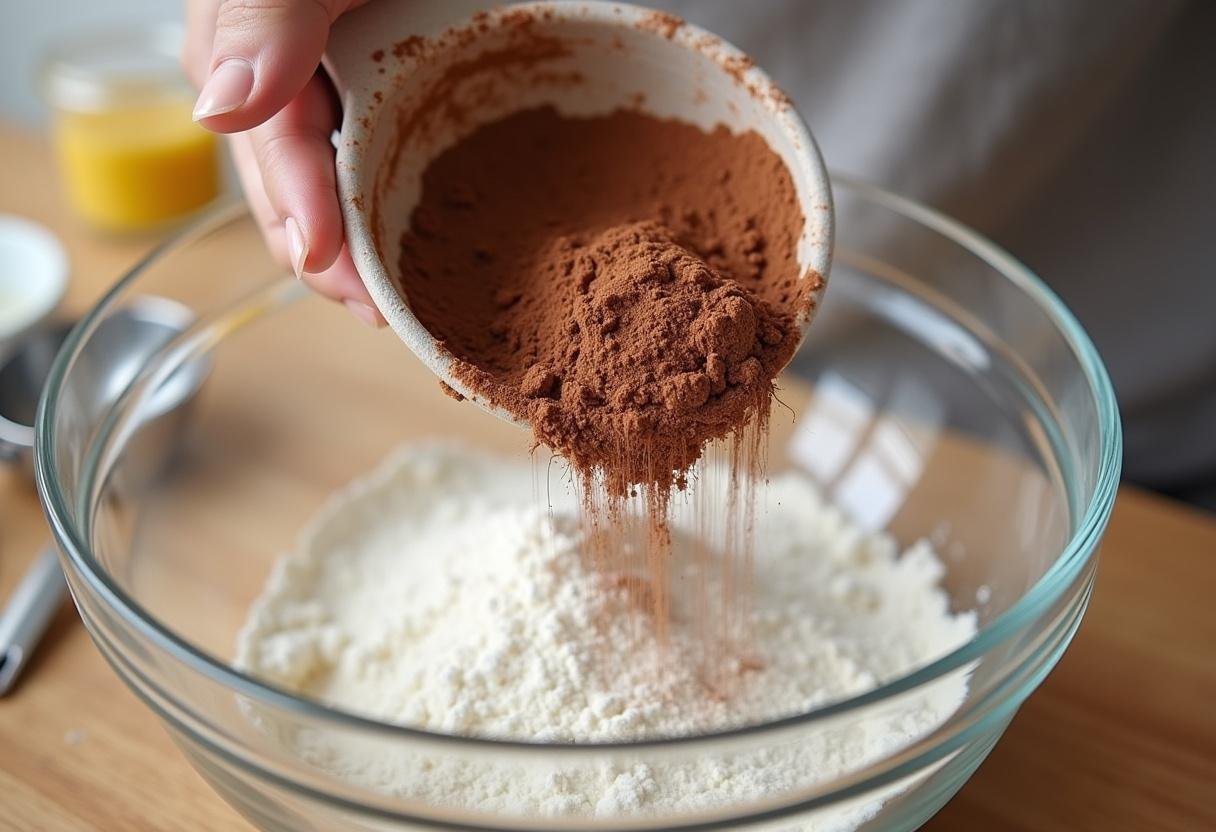
Step 2: Add Dry Ingredients
Add the vanilla extract and mix until just combined. In a separate bowl, whisk together the flour, cocoa powder, and salt to ensure even distribution. Gradually add the dry ingredients to the butter mixture on low speed, mixing just until incorporated. If you’re using nuts, now is the time to gently fold them in. The dough should come together smoothly but not be too sticky – if it feels too soft, you can chill it for 15-20 minutes before shaping.
Pro Tip: For the best cocoa flavor, use high-quality cocoa powder. Dutch-processed cocoa will give you a deeper chocolate flavor and darker color, while natural cocoa powder offers a more intense chocolate taste.
Step 3: Shape the Cookies
Using a small cookie scoop or tablespoon, portion out the dough and roll it between your palms to form smooth 1-inch balls. Place them on a parchment-lined baking sheet, spacing them about 1 inch apart. The small size ensures even baking and helps maintain that perfect snowball shape. If the dough becomes sticky while working with it, lightly dust your hands with powdered sugar rather than flour to prevent sticking.

Step 4: Bake and Dust
Preheat your oven to 350°F (175°C) and bake the cookies for 12-15 minutes until they’re set but not browned. The cookies will still feel soft when you take them out – this is normal as they’ll firm up as they cool. Let them cool on the baking sheet for about 5 minutes until they’re just cool enough to handle but still warm. Roll each cookie generously in powdered sugar, then transfer to a wire rack to cool completely. For that picture-perfect snowy look, give them a second dusting of powdered sugar once they’ve completely cooled.

4. Tips for Perfect Chocolate Snowball Cookies
- Butter temperature matters: Use room-temperature butter (about 65°F) for optimal creaming. Too cold and it won’t incorporate properly; too warm and your cookies may spread too much.
- Sifting is key: Sift both your powdered sugar for dusting and your dry ingredients to prevent lumps and ensure a smooth texture.
- Don’t overbake: These cookies continue to set as they cool. Remove them when they’re just set but still soft to the touch.
- Double dusting technique: The first coating of powdered sugar on warm cookies creates a slightly melted glaze, while the second coating on cooled cookies gives that fresh snowfall look.
- For extra decadence: Drizzle cooled cookies with melted chocolate or dip half of each cookie in chocolate for an elegant presentation.
- Storage secret: Place a slice of bread in your cookie container to help maintain moisture and prevent the cookies from drying out.
5. Variations
- Peppermint Twist: Add ½ teaspoon peppermint extract to the dough and crush some candy canes to mix with the powdered sugar for dusting.
- Double Chocolate: Fold in ½ cup mini chocolate chips or chopped dark chocolate for extra chocolatey goodness.
- Gluten-Free: Substitute the all-purpose flour with a 1:1 gluten-free flour blend or almond flour for a nutty variation.
- Espresso Infused: Add 1 tablespoon instant espresso powder to enhance the chocolate flavor without making the cookies taste like coffee.
- Orange Chocolate: Add 1 tablespoon orange zest to the dough for a citrusy twist that pairs beautifully with chocolate.
6. Serving Suggestions
These chocolate snowball cookies are incredibly versatile when it comes to serving:
- Create a beautiful cookie platter by mixing them with other holiday favorites like gingerbread and shortbread cookies.
- Serve alongside a warm beverage – they’re perfect with hot cocoa, spiced cider, coffee, or tea.
- For an adult dessert pairing, try them with a glass of dessert wine or a coffee liqueur.
- Package them in clear cellophane bags tied with festive ribbons for lovely edible gifts.
- Arrange them on a tiered dessert stand as part of your holiday dessert table.
7. Storage Instructions
Proper storage will keep your chocolate snowball cookies fresh and delicious:
- Room temperature: Store in an airtight container at room temperature for up to 1 week. Place parchment paper between layers to prevent sticking.
- Freezing unbaked dough: Shape the dough into balls and freeze on a baking sheet, then transfer to a freezer bag. Bake directly from frozen, adding 1-2 minutes to the baking time.
- Freezing baked cookies: Freeze undusted cookies in an airtight container for up to 3 months. Dust with powdered sugar after thawing.
- Reviving stale cookies: If cookies lose their freshness, place them in a 300°F oven for 2-3 minutes to refresh them before serving.
8. Frequently Asked Questions
Can I make these cookies ahead of time?
Yes! The dough can be refrigerated for up to 2 days before baking, or frozen for up to 3 months. Baked cookies (without the final dusting of powdered sugar) can be frozen for up to 3 months.
Why are my cookies crumbly?
Overbaking or using too much flour can cause dryness. Always measure flour by spooning it into the measuring cup and leveling it off, rather than scooping directly from the bag. Also, make sure not to overmix the dough after adding the flour.
Can I omit the nuts?
Absolutely—the cookies will still be delicious without them. If you omit the nuts, you might want to reduce the flour by 2 tablespoons to maintain the perfect texture.
Can I use salted butter instead of unsalted?
You can, but reduce the added salt to just a pinch. Unsalted butter gives you better control over the final flavor.
Why didn’t my powdered sugar coating stick?
Make sure to roll the cookies in powdered sugar while they’re still slightly warm. If they cool completely first, the sugar won’t adhere as well. The second dusting on completely cooled cookies will give you that perfect snowy look.
9. Conclusion
These chocolate snowball cookies are more than just a holiday treat – they’re little bites of joy that bring warmth to any winter gathering. With their rich cocoa flavor, delicate texture, and beautiful snowy appearance, they’re sure to become a cherished part of your family’s holiday traditions. The recipe is simple enough for beginner bakers yet yields impressive results that will have everyone asking for the recipe.
Remember that baking is as much about the experience as it is about the final product. The aroma of chocolate and butter wafting through your kitchen, the satisfaction of rolling perfect little dough balls, and the joy of sharing these treats with loved ones – these are the moments that make holiday baking so special. So put on your favorite holiday music, gather your ingredients, and enjoy the process of creating these delightful chocolate snowball cookies. Happy baking! 🎄🍪
