
✨ Crispy Baked Chicken Legs That Look Like Fryer-Dipped—But Are 100% Oven-Baked! ✨
1. Introduction
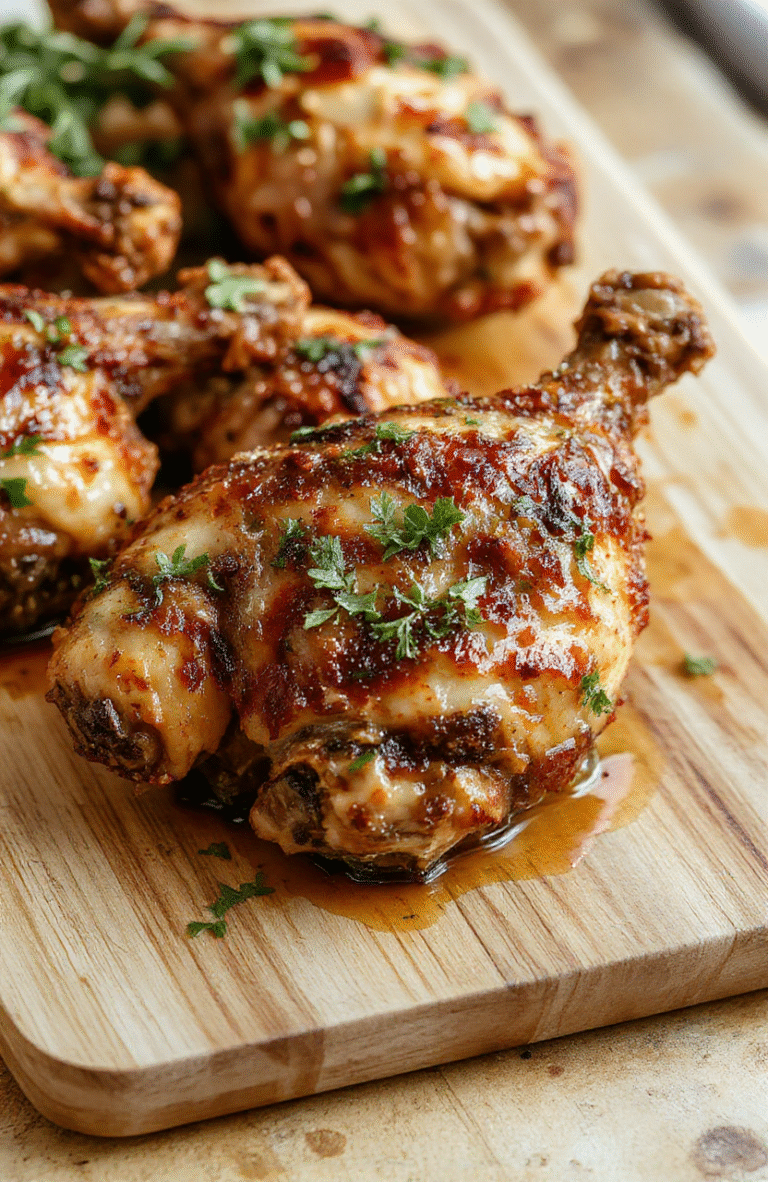
There’s nothing quite like pulling a tray of crispy baked chicken legs out of the oven—golden-brown, crackling at the edges, and juicy inside. This recipe delivers that irresistible crunch without a single drop of oil or deep fryer in sight. Perfect for busy weeknights, meal prep, or feeding a crowd, these chicken legs strike the ideal balance between comfort and convenience.
I Developed this method after years of testing baking techniques, and let me tell you: the secret lies in drying the skin *thoroughly* and finishing with a high-heat broil. It’s become a household staple—from game day snacking to pairing with our High-Protein Honey BBQ Chicken Mac & Cheese or Easy Comforting Bread Pudding on Sunday afternoons.
2. Why You’ll Love This Recipe
- ✅ Ready in 45 minutes—minimal prep, maximum flavor
- ✅ One-sheet pan dinner—less cleanup, more joy
- ✅ Healthy & high-protein: no breading, no frying, just smart seasonings
- ✅ Kid-approved (yes, even picky eaters love the crispy skin!)
- ✅ Versatile: pairs beautifully with roasted veggies, mashed potatoes, or grain bowls
3. Ingredient Notes
Quality & technique matter more than complexity here. Let me walk you through why each choice was made:
- Chicken legs (drumsticks or thighs, or a mix): I recommend bone-in, skin-on for maximum flavor and crispiness. The collagen in the skin melts during baking and then reconstricts during broiling, giving you that legendary crunch. Look for air-chilled chicken—less water retention means better browning.
- Kosher salt: Its larger crystals help draw out moisture from the skin more effectively than table salt—key for crispiness. Always seasoning *before* baking is non-negotiable.
- Garlic powder + smoked paprika: These add depth without burning (fresh garlic can scorch). Smoked paprika gives a subtle charred vibe, perfect if you don’t have a grill.
- Onion powder + black pepper: The holy trinity of savory backnotes. Freshly cracked pepper adds a floral heat.
- Olive oil (optional, but recommended): Just 1 tsp helps the spices adhere and nudges browning—but *don’t skip the drying step* even if you use oil!
Pro recommendation: Try a splash of apple cider vinegar (½ tsp) in your seasoning mix—it subtly tenderizes the meat without adding tanginess.
4. Kitchen Tools You Need
While you *can* make these chicken legs with just a baking sheet, having the right tools makes all the difference in achieving consistent results. Here’s what I rely on in my own kitchen:
- Large rimmed baking sheet: Essential for catching drips and promoting airflow. A wire rack placed on top (like the one in your Compact 6-in-1 Digital Air Fryer) will elevate your bake game even further.
- Instant-read thermometer: No guessing! Chicken legs are done at 175°F internal temperature—juicy yet safe. Pair your reading with a Ninja Air Fryer Pro Crisp & Roast 4-in-1 for perfect reheating.
- Small bowl for dry brine: A simple glass bowl keeps your seasoning mix contained and mess-free. Store extra in a JoyJolt Airtight Glass Food Storage Set for quick next-week prep.
- Sharp knife & cutting board: Trimming excess fat helps fat render evenly. My go-to prep tool is the Fullstar Ultimate Veggie Prep Master—it’s fantastic for trimming meat, too!
5. How to Make Crispy Baked Chicken Legs
This method has four distinct phases—dry brining, roasting, broiling, and resting. Each builds on the last to deliver crunch and tenderness.
Phase 1: Dry Brine (15 min–24 hrs)
Rinse chicken legs under cold water, then pat *extremely* dry with paper towels—seriously, rub until the skin feels leathery. In a small bowl, mix 2 tsp kosher salt, 1 tsp black pepper, 1 tsp garlic powder, 1 tsp smoked paprika, and ½ tsp onion powder. Rub this mixture all over the skin and under the skin near the meat (don’t peel it off!). Place on a plate, uncovered, in the fridge. Why? This step dries the skin deeply for optimal crispness.
Phase 2: Roast Low & Slow (30 mins)
Preheat oven to 375°F. Arrange chicken skin-side up on a rimmed baking sheet (lined with parchment for easy cleanup, if desired). Roast 25–30 minutes. You’re aiming for the skin to be pale gold and slightly puffed—not brown yet. Why low and slow? It renders fat gently so the meat stays tender and doesn’t seize up.
Phase 3: Broil to Crisp (3–5 mins)
Turn oven to HIGH BROIL. Move chicken to the top rack (4–6 inches from heat). Broil 3–5 minutes, watching like a hawk! The skin should turn deep golden, blistered in spots, and crispy. Flip halfway if needed. *Visual cue:* it should sizzle and smell nutty and caramelized—like a perfect sear.
Phase 4: Rest & Serve (10 mins)
Transfer to a plate and tent loosely with foil. Let rest at least 10 minutes. This lets juices redistribute—no more dry drumsticks! Serve with lemon wedges for brightness or your favorite dip, like our Homemade Tonkatsu Sauce.
6. Expert Tips for Success
- 🚫 Avoid chicken with “solution” labels. “Up to 15% self-basting solution” = soggy skin. Stick to “plain” or “no added ingredients.”
- 🔥 For extra crispy skin, sprinkle a pinch of baking soda (½ tsp) with the salt during dry brine—it raises pH, speeding up browning.
- ❄️ Make ahead: Dry brine up to 24 hrs in advance. Store uncovered in the fridge—then bake fresh the day of.
- 🧊 Don’t freeze *before* baking. Freeze *after* cooking—reheat in the air fryer at 380°F for 4–5 mins for renewed crispness.
- 🔥 Use your oven’s convection setting if available—it circulates hot air for 20% faster crisp development.
7. Variations & Substitutions
- Spicy Kick: Add ½ tsp cayenne or chili flakes to the dry rub.
- Southwest Style: Swap paprika for chipotle powder, add cumin, and top with avocado crema.
- Honey-Glazed: Brush with 1 tbsp honey + 1 tsp soy sauce during the last 2 minutes of broiling.
- Herb-Crusted: Press 2 tbsp chopped rosemary & thyme into skin before broiling.
- Air Fryer Option: Air fry at 400°F for 22–25 mins (flip halfway), then broil 2 mins for extra crunch. Use your Ninja Air Fryer Pro for best results!
8. Storage & Reheating
Store leftovers in an airtight container in the fridge for up to 4 days. To reheat—and restore crispiness—do NOT microwave. Instead:
- Oven: 400°F for 10–12 mins on a rack-lined sheet.
- Air Fryer: 375°F for 4–5 mins, shake halfway.
- Toaster Oven: 380°F for 6–8 mins.
For meal prep: Freeze cooked chicken in portions. Reheat directly from frozen at 350°F for 20–25 mins (or air fry 8–10 mins).
9. FAQ
Can I use chicken thighs instead of drumsticks?
Absolutely! Bone-in, skin-on thighs work great—just reduce baking time to 20–25 mins (they’re thinner) before broiling. They’re also healthy baked chicken thighs at heart: slightly leaner and ultra-tender.
Why is my skin not crispy?
Three common culprits: 1) Skin wasn’t dry enough before seasoning, 2) Oven temp was too low, or 3) Skipped the broil finish. Double-check your oven thermometer—many ovens run cooler than displayed!
Are crispy baked chicken legs keto-friendly?
Yes! At ~0g net carbs per drumstick, they’re perfect for keto. Skip any sugary glazes and pair with low-carb sides like roasted broccoli or zucchini noodles.
Can I make these on the grill?
Definitely! Use a two-zone fire: 30 mins indirect heat (350°F), then 2–3 mins direct high heat to crisp skin. For consistent results and smoky flavor, try the Ninja FlexFlame 5-in-1 Outdoor Grill & Smoker.
10. Conclusion
This crispy baked chicken legs recipe proves that fast, fuss-free dinners don’t have to skip on flavor or texture. With a little planning and smart oven tricks, you’ll have restaurant-quality chicken—crackling skin, juicy meat, and zero guilt. Pair it with our Mac & Cheese for a cozy weeknight win, or serve solo with seasonal roasted veggies. Now go forth—and enjoy that crunch! Print
Crispy Baked Chicken Legs
Crispy baked chicken legs with seasoned skin, roasted to juicy perfection in under 40 minutes — a healthy, family-friendly weeknight dinner.
- Total Time: 45 minutes
- Yield: 3 servings
Ingredients
- 6 chicken legs (thigh-drumstick combos), skin-on
- 2 tbsp olive oil
- 1 tsp kosher salt
- 1 tsp black pepper
- 1 tsp garlic powder
- 1 tsp smoked paprika
- 1 tsp dried rosemary
- ½ tsp dried thyme
- ½ tsp onion powder
- 1 lemon, quartered
- Fresh rosemary sprigs for garnish
Instructions
- Preheat oven to 425°F (220°C). Line a baking sheet with parchment paper.
- Rinse chicken legs, pat dry thoroughly with paper towels — dry skin is key for crispiness.
- In a small bowl, mix salt, pepper, garlic powder, smoked paprika, rosemary, thyme, and onion powder.
- Drizzle chicken with olive oil, then rub seasoning mixture evenly over all surfaces, including under the skin if possible.
- Place chicken legs on the baking sheet, spaced apart. Tuck lemon wedges and rosemary sprigs around them.
- Bake 25 minutes, then broil on high for 3–5 minutes until skin is deep golden and crispy.
- Let rest 5 minutes before serving. Garnish with extra rosemary and serve with lemon wedges.
Notes
- Patting the chicken skin *very* dry before seasoning helps maximize crispiness.
- For extra-crispy skin, refrigerate uncovered chicken legs on a rack for 1 hour before seasoning.
- Serve with roasted vegetables, mashed potatoes, or a fresh salad for a complete meal.
- Prep Time: 15 minutes
- Cook Time: 30 minutes
- Method: Baking
- Cuisine: American
- Diet: High Protein
Nutrition
- Serving Size: 2 chicken legs
- Calories: 380 Kcal
- Sugar: 1 g
- Sodium: 520 mg
- Fat: 24 g
- Saturated Fat: 6 g
- Unsaturated Fat: 15 g
- Trans Fat: 0 g
- Carbohydrates: 3 g
- Fiber: 0 g
- Protein: 37 g
- Cholesterol: 140 mg
