
✨ Crispy Honey Butter Chicken with Garlic Rice – A Sweet & Savory Weeknight Winner ✨
1. Introduction
Forget takeout tonight—this crispy honey butter chicken brings down-home comfort with a glossy, sticky-sweet glaze and an irresistible golden crust, all served over fragrant, garlicky rice. With just 20 minutes of active cooking and one pan to clean, it’s the kind of dish that turns even the busiest evening into a celebration. I first created this recipe on a rainy Thursday when I craved the rich, restaurant-style glaze of honey garlic chicken but wanted something with more texture and depth—and this version delivers big-time.
2. Why You’ll Love This Recipe
- Ready in under 30 minutes—perfect for busy weeknights when dinner can’t be a hassle.
- One-pan meal—chicken and rice cook together for effortless cleanup (and deeper flavor transfer!).
- Big, bold flavor—caramelized honey meets earthy garlic and rich butter in every bite.
- Kid-approved (and adult-obsessed)—that glossy, savory-sweet glaze is pure magic on tender chicken and fluffy rice.
- Versatile base—easily swap proteins or add veggies for a full-color plate.
3. Ingredient Notes
Quality is everything when working with just a handful of key ingredients—especially since the sauce is the star. Use boneless, skinless chicken thighs instead of breast for maximum tenderness and natural juiciness. They’re more forgiving if you slightly overcook them, and they absorb the honey-butter glaze beautifully.
Honey should be raw or lightly filtered—it adds depth beyond regular supermarket grades, and its natural sugars caramelize more evenly for that glossy, clinging finish. I reach for local raw clover honey when I can.
Garlic needs to be fresh and finely minced or pressed. Pre-minced garlic lacks the punch and can turn bitter when roasted or glazed. Use at least 5 cloves—you’ll thank me later when that aroma fills your kitchen.
Butter? Go unsalted, so you control the salt level. Real European-style butter with higher fat content gives the sauce more body and richness. And don’t skip the soy sauce—it adds umami magic. Low-sodium tamari works well for gluten-free needs.
For the rice, short-grain white rice (like Calrose) absorbs sauce best and pairs perfectly with the sticky chicken. For extra protein or crunch, stir in toasted sesame seeds or chopped scallions right before serving.
4. Kitchen Tools You Need
You don’t need fancy gear, but a few well-chosen tools make all the difference—especially for getting that crispy exterior on the chicken without burning the delicate glaze.
The Ninja Air Fryer Pro Crisp & Roast 4-in-1 delivers restaurant-quality crispiness in half the time, using rapid air circulation to dry the surface before the glaze hits—ensuring that shatter-crisp crust we all crave. Bonus: It keeps the kitchen cool on warm evenings.
For stovetop cooking, the CAROTE Premium 16pc Nonstick Cookware Set is a game-changer—especially the deep, 12-inch skillet with high, sloped sides. Its titanium-reinforced coating handles high-heat searing and glaze reduction without sticking, and it’s dishwasher-safe for nights when even cleanup matters.
And if you love rice daily like I do, consider the Cuisinart Compact Automatic Bread Maker for perfectly fluffy rice in minutes (yes—it doubles as a rice cooker with custom settings!). Or pair it with the Cuisinart 2-Quart Stainless Steel Ice Cream Maker for post-dinner bliss—you’re clearly into quick wins.
5. How to Make Crispy Honey Butter Chicken with Garlic Rice
Phase 1: Prep & Par-Cook Rice (10 minutes)
Step 1: Rinse 1 cup of short-grain white rice until water runs clear. Drain well. In your skillet (or air fryer-safe dish), combine the rice with 1¼ cups of broth or water (chicken stock adds extra richness), 1 tbsp butter, 1 minced garlic clove, and a pinch of salt. Stir gently.
Step 2: If using the stovetop: Bring to a boil, cover, reduce heat to low, and simmer for 15 minutes. Remove from heat and let stand, covered, for 5 more minutes—do *not* peek!
Step 3: If using an air fryer: Place the rice mixture in an air fryer-safe dish. Air fry at 350°F (175°C) for 18 minutes, then let rest 5 minutes. *Pro tip: Cover the dish with foil for the first 12 minutes to trap steam, then remove for the last 6 to crisp the top.*
Phase 2: Crisp & Glaze the Chicken (12 minutes)
Step 4: Pat chicken thighs *very* dry with paper towels—this is critical for crispiness. Season lightly with salt and pepper.
Step 5: Heat 1 tbsp oil in a large oven-safe skillet over medium-high heat. Add chicken and sear undisturbed for 4–5 minutes per side until deeply golden-brown and crispy on both sides. (Use a splatter screen if needed!) Transfer chicken to a plate—it’ll finish cooking in the sauce later.
Step 6: In the same skillet (no cleaning necessary—hello, flavor!), melt 3 tbsp butter over medium heat. Add 4 cloves minced garlic and sauté 45 seconds until fragrant but not browned.
Step 7: Whisk in 3 tbsp honey, 2 tbsp soy sauce, 1 tbsp brown sugar, ½ tsp ginger powder (or fresh grated), and ¼ tsp red pepper flakes. Simmer 2 minutes until slightly thickened.
Step 8: Return chicken to the pan, glossy-side up. Spoon glaze over repeatedly for 1 minute. If using the oven: Broil for 2–3 minutes to deepen color and crisp edges further. Watch closely—honey burns easily!
Phase 3: Assemble & Serve
Spoon warm garlic rice onto plates, top with two chicken thighs, and drizzle with extra glaze from the pan. Garnish with sliced scallions, sesame seeds, and a squeeze of lime for brightness. That first bite? You’ll swear it’s from your favorite Asian fusion spot.
6. Expert Tips for Success
Never skip the dry-and-sear step. Moisture is the enemy of crispiness. Even if your chicken seems dry, blot both sides with paper towels. Patience during the sear builds the Maillard reaction—the chemical magic that delivers deep, savory color and crunch.
Beware honey burn. Add honey *after* the garlic (not with it), and keep heat at medium-low once it’s in the pan. Honey caramelizes fast—once it bubbles like syrup, you’ve got 60 seconds to act.
Slice the chicken after glazing. For plating flair, let chicken rest 3 minutes, then slice against the grain. The glaze won’t run, and each bite reveals the tender interior and crisp caramelized edges.
Use broth instead of water. Even store-bought low-sodium broth adds a subtle backbone to the rice—never plain water.
7. Variations & Substitutions
Gluten-free: Swap soy sauce for tamari or coconut aminos. Same depth, no wheat.
Low-sugar: Replace honey with 2 tbsp maple syrup or allulose-based sweetener. Taste and adjust—some alternatives lack the caramel notes of honey.
Spice it up: Add 1 tsp gochujang to the glaze for Korean-inspired flair, or stir in ½ tsp crushed red pepper flakes with the garlic.
Vegetarian version: Use extra-firm tofu or mushroom caps. Press tofu 15 minutes, cube, and air fry at 400°F for 12 minutes before glazing.
Vegetable boost: Toss in blanched broccoli florets or sugar snap peas in the last 2 minutes of rice cooking—add a vibrant green/pop of crunch.
8. Storage & Reheating
Store leftovers in JoyJolt Airtight Glass Food Storage Set containers (they stack beautifully and go straight from fridge to microwave). Keep chicken and rice separate to preserve texture.
Reheat in oven: For best crispiness, bake chicken at 375°F for 10–12 minutes. Reheat rice with a splash of water, covered, for 2 minutes—stir, then reheatch.
Air fryer reviver: Air fry chicken at 350°F for 3–4 minutes until crackling again. Don’t reheat rice in the air fryer—it dries out fast.
This dish keeps well for 3 days—though it rarely lasts that long at my house!
9. FAQ
Q: Can I use chicken breast?
A: Yes—but it’s more prone to drying out. Sear for just 3 minutes per side and finish cooking in the sauce at lower heat. Or use a meat thermometer (safe temp = 165°F).
Q: My glaze turned out runny. What went wrong?
A: You likely removed it from heat too soon. Simmer the sauce 2+ minutes to reduce and thicken. If it’s still thin, mix ½ tsp cornstarch with 1 tbsp cold water and whisk into the simmering sauce until thickened (about 30 seconds).
Q: Why did my garlic burn?
A> Garlic burns at just 280°F—medium-low heat and constant stirring prevent this. I recommend minced garlic *added after* honey (which coats and protects it) or using garlic powder for the first 2 minutes, then fresh mince added at the end.
Q: Can I double the recipe for meal prep?
A: Absolutely. Just double everything and use two skillets or a large oven-safe pan. The air fryer version (using multiple baskets or batches) works great too—perfect for feeding a crowd or batch-cooking.
10. Conclusion
This crispy honey butter chicken proves that easy weeknight dinners don’t mean compromising on flavor or texture. That shiny, sticky glaze clinging to golden-brown chicken? That’s the kind of moment that turns dinner into an event—no reservations required. Serve it with the garlic rice we’ve perfected, and you’ve got a dish so comforting, even leftovers taste like victory.Ready? Set your timer, grab your air fryer or pan, and let’s make tonight one to remember.
Print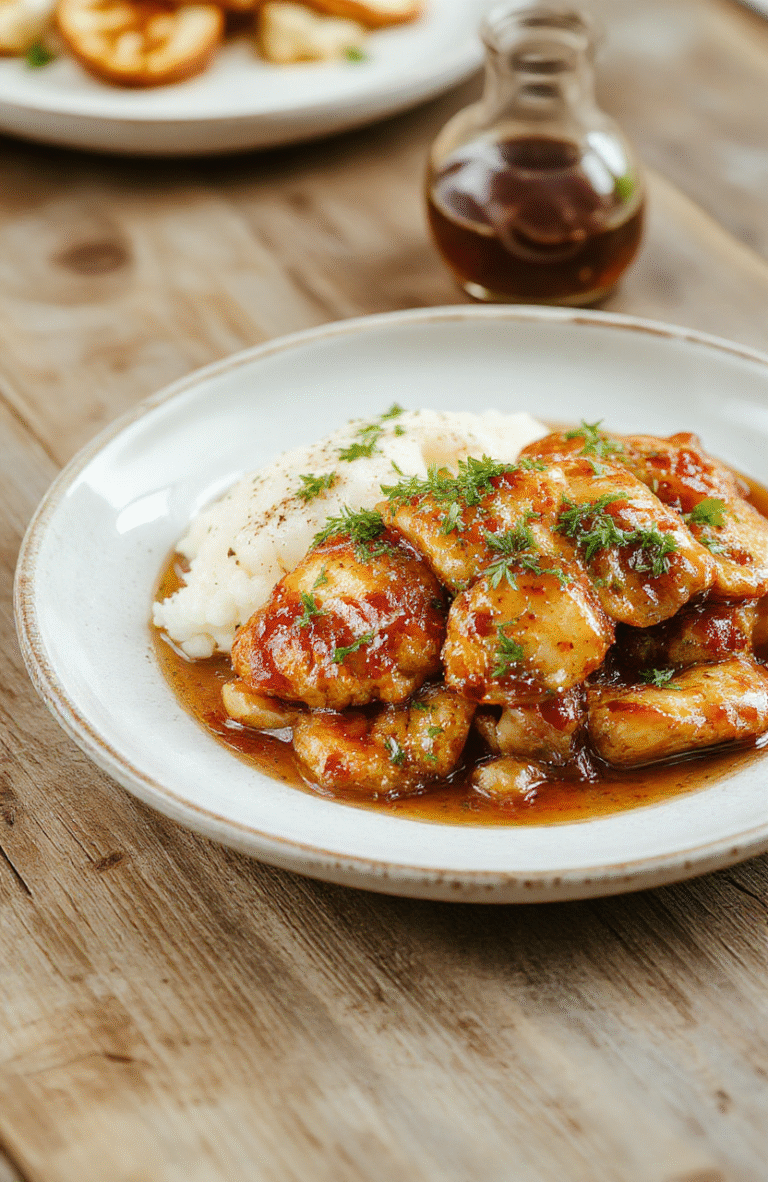
Crispy Honey Butter Chicken with Garlic Rice
A quick, crispy, and sticky-sweet honey butter chicken dish made with a one-pan method. Perfect for busy weeknights.
- Total Time: 30 min
- Yield: 4 servings
Ingredients
- 1 lb boneless, skinless chicken thighs,cut into 1-inch pieces
- 1/2 cup all-purpose flour
- 1 tsp baking powder
- 1/2 tsp salt
- 1/4 tsp black pepper
- 2 tbsp vegetable oil
- 3 tbsp butter
- 4 garlic cloves, minced
- 1/4 cup honey
- 2 tbsp soy sauce
- 1 tbsp rice vinegar
- 1/2 tsp red pepper flakes (optional)
- Sesame seeds & green onions for garnish
Instructions
- Toss chicken pieces with flour, baking powder, salt, and pepper until evenly coated.
- Heat oil in a large skillet over medium-high heat. Add chicken and cook until golden and crispy, about 5–6 minutes. Remove and set aside.
- In same skillet, melt butter. Add garlic and sauté 30 seconds until fragrant.
- Stir in honey, soy sauce, rice vinegar, and red pepper flakes. Bring to a simmer.
- Return chicken to skillet and toss to coat in glaze. Cook 2 minutes until sauce thickens and coats chicken.
- Serve immediately over rice, garnished with sesame seeds and green onions.
Notes
- For extra crispiness, double-dip chicken in flour before frying.
- Baking powder helps create a puffier, crispier crust.
- Can be made ahead and reheated in air fryer to restore crispness.
- Prep Time: 10 min
- Cook Time: 20 min
- Method: Stovetop
- Cuisine: American-Asian Fusion
- Diet: Non Vegetarian
Nutrition
- Serving Size: 1 cup chicken + 1/2 cup rice
- Calories: 425 Kcal
- Sugar: 18g
- Sodium: 610mg
- Fat: 18g
- Saturated Fat: 6g
- Unsaturated Fat: 11g
- Trans Fat: 0g
- Carbohydrates: 38g
- Fiber: 1g
- Protein: 28g
- Cholesterol: 95mg
