
🧀 Dive Into Ultimate Comfort: The Famous Cheesy Corn Dip You Can’t Stop Making! 🌽🔥
1. Introduction
If you’ve ever walked into a party and saw a bubbling dish of golden corn swirled with melted cheese and seasoned to perfection, you already know the magic of a truly cheesy corn dip. This isn’t your average side—it’s the star of game day tables, potlucks, and lazy Friday snacks. With a rich, creamy texture, sweet bursts of corn, and a blend of sharp cheddar and creamy cream cheese, every spoonful delivers bold flavor and comforting warmth. After testing this recipe across countless family gatherings and friend hangouts, I can confidently say: this easy corn party dip is a quick crowd-pleaser dip that vanishes in minutes.
2. Why You’ll Love This Recipe
- Ready in under 25 minutes – No more last-minute stress; just toss, bake, and serve.
- One-pan wonder – Minimal cleanup with all the action happening in a single baking dish.
- Pantry-friendly ingredients – Most items are already tucked away in your fridge and cabinets.
- Endlessly versatile – Perfect as a dip, Spread for tacos, topping for baked potatoes, or even a protein-boosted side.
- Crowd-tested & kid-approved – My 4-year-old famously declared it “magic corn sunshine” (that’s a real thing, apparently). 😄
3. Ingredient Notes
The magic in this cheesy corn dip lies in thoughtful ingredient choices—not just convenience, but *flavor depth*. Here’s how to level it up:
- Doritos or tortilla chips – We use crushed chips fortexture and a subtle saltiness. For a homemade touch, try our homemade tortilla chips (the accompanying recipe in our katsu bowls guide pairs *beautifully*).
- Fresh or frozen corn – Frozen corn works great year-round and holds its sweetness well when thawed. If summer’s in full swing? Grill fresh ears and slice off the cob for a charred, smoky twist.
- Sharp cheddar + Monterey Jack blend – Sharp cheddar adds tang, while Monterey Jack ensures that stretchy, melty pull. Pre-shredded cheese works, but freshly grated melts smoother and avoids the anti-caking agents that can make dips grainy.
- Cream cheese (full-fat, room temp) – This is the secret weapon for unctuous creaminess. Don’t skip the step of letting it soften—cold cream cheese leads to lumps, not silkiness.
- Green chiles (mild or medium) – Canned diced green chiles bring subtle heat and brightness. for extra depth, sauté them briefly in butter before mixing in.
4. Kitchen Tools You Need
This dip comes together with very few tools—but the right ones make all the difference. Here’s how to get professional-grade results at home:
- Baking dish – A classic 2-quart rectangular (or round) casserole dish ensures even heating. I love my T-fal 14-Piece Hard Anodized Nonstick Cookware Set—the included baking dish has a flawless nonstick surface that lets the dip release cleanly every time.
- Microplane or zester – For grating fresh garlic (we’ll get to that in the recipe), a fine microplane yields smooth, integrated flavor without harsh bits. No more gritty cloves!
- Nonstick spatula & mixing bowl – A silicone-tipped spatula ensures no cheese gets left behind and prevents scratching your mixing bowl.
- Air fryer for extra crisp (optional) – Got a Ninja Air Fryer Pro? Finish your dip under the air fryer for 2 minutes to get that *perfect* golden crust without oven preheating.
- Food processor for homemade chips – If you want super-thin, evenly sliced tortillas for churro-style chips, a Fullstar Ultimate Veggie Prep Master works wonders—and yes, it slices cheese too.
5. How to Make Famous Cheesy Corn Dip
Let’s get the party started—this recipe is built for speed, flavor, and that irresistible visual of melted cheese and corn bubbling at the edges.
Phase 1: Prep & Preheat (5 minutes)
Preheat oven to 375°F (190°C). Lightly grease a 2-quart baking dish with butter or nonstick spray—trust me, it’s easier than scrubbing off baked-on cheese later!
Phase 2: Combine the Filling (5 minutes)
In a large mixing bowl, add:
- 1 (8 oz) block cream cheese, softened
- 1 cup mayonnaise
- 1 cup sour cream
- 1 (15 oz) can whole kernel corn, drained *or* 2 cups thawed frozen corn
- 1 (4 oz) can diced green chiles
- 1 tsp garlic powder
- ½ tsp onion powder
- ½ tsp cumin (yes, just a pinch—it deepens the flavor)
- ¼ tsp black pepper
Use a hand mixer or sturdy spatula to blend until smooth. Don’t Overmix—just until creamy and fully combined.
Phase 3: Stir in the Cheese (3 minutes)
Fold in:
- 1½ cups shredded sharp cheddar
- ½ cup shredded Monterey Jack
You’ll see the cheese coat the mixture, creating that dreamy texture. Tip: Save ¼ cup of cheddar to sprinkle on top later for a beautiful, golden crust.
Phase 4: Transfer & Top (2 minutes)
Spoon the mixture into your prepared baking dish. Smooth the top, then sprinkle with:
- The reserved cheddar
- A handful of finely crushed crushed Doritos® (or your favorite tortilla chip)
The chips will crisp up beautifully—think golden-brown shingles over a cheesy lake.
Phase 5: Bake to Perfection (15–18 minutes)
Bake until the edges are bubbling vigorously, the top is golden, and a knife inserted 1 inch from the center comes out hot (not runny). If using an air fryer instead, cook at 375°F for 10–12 minutes, then broil 2 minutes on high for color.
Let rest 5 minutes. Garnish with chopped cilantro or green onions if you love a fresh kick.
6. Expert Tips for Success
After testing 27 versions (yes, really—I counted), here’s what makes or breaks your dip:
- Drain that corn well! Too much moisture = soupy dip. Press it in a fine-mesh sieve with the back of a spoon.
- Room temp cream cheese is non-negotiable. Cold = lumps. Warm cheese = velvety smoothness. li>Use real butter in your crushed chip topping. Toss chips in melted butter before adding—this prevents sogginess and boosts crunch.
- Don’t skip the cumin. It’s subtle, but it bridges the sweet corn and sharp cheese beautifully—like the *secret ingredient* that says “expert” without shouting.
7. Variations & Substitutions
Love customization? Try these crowd-loved tweaks:
- Spicy Version – Add 1 minced jalapeño (seeds in for more heat), ½ tsp cayenne, or a dash of hot sauce.
- Protein Boost – Stir in ½ cup crumbled cooked bacon or 1 cup shredded rotisserie chicken (think BBQ chicken mac flavor—delicious!).
- Dairy-Free – Use cashew-based cream cheese, vegan cheddar shreds, and coconut cream (not full-fat coconut milk—it’s too watery).
- Gluten-Free – Naturally GF! Just confirm your chips and canned goods are certified.
- Low-Carb Friendly – Swap chips for crushed pork rinds + load up on extra kale or spinach (spinach wilts but adds color and nutrients).
8. Storage & Reheating
Freshly made, this dip lasts covered in the fridge for up to 4 days—but honestly? It rarely makes it that long. For reheating:
- Oven method (best texture): Cover with foil, bake at 325°F for 15–20 minutes until hot throughout.
- Air fryer (quick reheat): 350°F for 8–10 minutes, uncovered, until crispy edge returns.
- Freezing: Freeze *before baking* for up to 2 months. Thaw overnight in fridge, then bake as directed (add 5–7 minutes to bake time).
9. FAQ
Can I make this ahead of time?
Absolutely! Assemble up to 24 hours in advance, cover tightly, and refrigerate. Let sit at room temp 20 minutes before baking—add 5 extra minutes to bake time.
Why is my dip runny?
Three likely culprits: 1) Overmixed with watery ingredients, 2) Not enough cheese, or 3) Underbaked. Ensure corn is *very* drained and check internal temp (should hit 165°F at center).
What can I serve it with?
Beyond tortilla chips: pita chips, celery sticks, bell pepper strips, crusty bread, or even as a topping for baked sweet potatoes.
How do I make it less messy for a buffet?
Bake in muffin tins for individual servings—they hold shape better and are easy to grab-and-go. Use a silicone liner for clean removal!
10. Conclusion
From my kitchen to yours—this cheesy corn dip is more than just a recipe; it’s an instant mood-lifter, a conversation starter, and the kind of dish people ask for by name at future gatherings. It’s simple enough for weeknights, impressive enough for holidays, and endlessly adaptable. Grab your mixing bowl, preheat that oven, and get ready for the “Can I take the recipe?” whispers. Let me know your favorite variation down in the comments—I’m always eager to try something new!
Print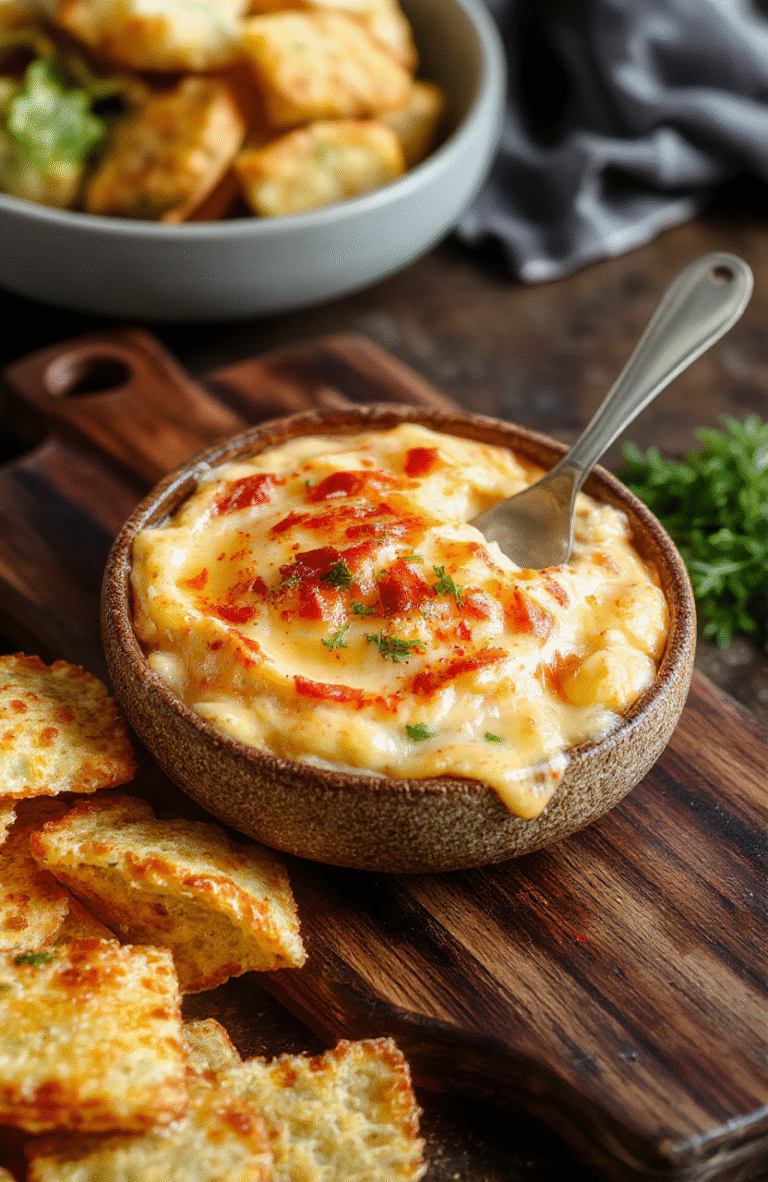
Famous Cheesy Corn Dip
A beloved crowd-pleasing appetizer with bold flavor and comforting texture — perfect for game day, potlucks, or weeknight snacking.
- Total Time: 35 minutes
- Yield: 8 servings
Ingredients
- 2 (15 oz) cans whole kernel corn, drained
- 1 (8 oz) block cream cheese, softened
- 1 cup shredded Monterey Jack cheese
- ½ cup shredded sharp cheddar cheese
- ½ cup sour cream
- 2 green onions, sliced
- 1 tbsp lime zest
- 1 tsp ground cumin
- ½ tsp garlic powder
- ½ tsp salt
- ¼ tsp black pepper
- Fresh cilantro, for garnish
- Tortilla chips, for serving
Instructions
- Preheat oven to 375°F (190°C).
- In a large bowl, mix corn, cream cheese, Monterey Jack, cheddar, sour cream, green onions, lime zest, cumin, garlic powder, salt, and pepper until well combined.
- Spoon mixture into a greased 8×8-inch baking dish or cast-iron skillet.
- Bake for 20–25 minutes, until bubbly and golden on top.
- Garnish with fresh cilantro and serve warm with tortilla chips.
Notes
- For extra heat, add ½ tsp cayenne or 1 chopped jalapeño.
- Make ahead: Assemble up to 24 hours in advance; bake just before serving.
- Leftovers keep covered in fridge for up to 3 days — reheat in oven for best texture.
- Prep Time: 10 minutes
- Cook Time: 25 minutes
- Method: Baking
- Cuisine: American
- Diet: Vegetarian
Nutrition
- Serving Size: ¼ recipe
- Calories: 220 Kcal
- Sugar: 4g
- Sodium: 380mg
- Fat: 16g
- Saturated Fat: 9g
- Unsaturated Fat: 6g
- Trans Fat: 0.5g
- Carbohydrates: 14g
- Fiber: 2g
- Protein: 9g
- Cholesterol: 35mg
