
✨ Crispy Chicken Tenders That Beat the Drive-Thru — Made at Home in 30 Minutes! ✨
1. Introduction
There’s something magical about the first bite of crispy chicken tenders—golden, shatteringly crisp on the outside, tender and juicy within, and finished with that signature subtle salt-kissed crunch Chick-fil-A is famous for. But here’s the truth: you don’t need a drive-thru lane or a drive-thru mindset to enjoy restaurant-style chicken tenders. With just a few pantry staples, a Butcher’s trick or two, and maybe five minutes of prep, you can make homemade chicken tenders that taste *even better* than the original. In fact, they’re so good, you’ll wonder why you ever waited in line.
2. Why You’ll Love This Recipe
- Ready in under 25 minutes — faster than ordering delivery.
- One-pan cooking — less cleanup, more flavor.
- Customizable seasonings — adjust heat, salt, or spice to fit *your* taste.
- Gluten-free & dairy-free options — easily adapted for dietary needs.
- Perfect for meal prep, parties, or quick weeknight dinners.
3. Ingredient Notes
The secret to real-deal restaurant style chicken tenders isn’t just the breading—it’s how you prepare it. Start with boneless, skinless chicken tenders (not strips!)—they’re naturally tender, uniform in shape, and cook evenly. I prefer brining them in buttermilk with a splash of hot sauce and garlic powder for at least 30 minutes (or up to 24 hours for maximum flavor infusion). For the coating, a blend of all-purpose flour + cornstarch gives you that signature crispness that doesn’t get soggy. Kosher salt is non-negotiable for even seasoning, and a pinch of cayenne adds just enough warmth to keep people coming back for more. Oh—and don’t skip the freshly ground pepper. Pre-ground pepper loses its bite fast.
4. Kitchen Tools You Need
You don’t need fancy gear to make these tenders—but having the right tools makes all the difference in replication accuracy and cleanup ease. For air-frying (my go-to for ultra-crispy results with 90% less oil), the Compact 6-in-1 Digital Air Fryer by Amazon Basics is a game-changer. Its precise temperature control ensures golden-brown crispness without burning—even when you’re multitasking in the kitchen. If you prefer deep-frying for that *true* fry-shop texture, a sturdy set like the T-fal 14-Piece Hard Anodized Nonstick Cookware Set handles high heat beautifully and resists warping. For multitaskers who love versatility, the Ninja Foodi Smart XL Indoor Grill & Air Fryer Combo can grill, air fry, broil, *and* dehydrate—perfect if you want a smokier finish. And if you want restaurant-worthy results for your whole family, the Ninja Air Fryer Pro Crisp & Roast 4-in-1 boasts a larger basket and built-in temperature probe for foolproof doneness every time.
5. How to Make Crispy Chicken Tenders
Brining & Prep (15 mins + 30+ mins marinating)
Begin by rinsing and patting dry your chicken tenders. In a shallow dish, whisk together 1 cup buttermilk, 1 tsp hot sauce (like Frank’s RedHot), 1 minced garlic clove, ½ tsp black pepper, and 1 tsp kosher salt. Add the tenders, making sure they’re fully submerged, then cover and refrigerate. The longer they soak (even up to overnight), the more tender and flavorful they’ll be.
Dredging Station (5 mins)
In a wide bowl, combine 1 cup all-purpose flour, ¼ cup cornstarch (for extra crunch), 1 tsp smoked paprika, 1 tsp garlic powder, 1 tsp onion powder, 1 tsp kosher salt, and ½ tsp black pepper. Stir well—this is where your seasoned crust is born.
Double-Dip Coating (The Secret Step)
Remove one tender at a time from the buttermilk, letting excess drip off. Dredge thoroughly in the flour mixture, pressing firmly. Here’s the pro move: dip the tender *back* into the buttermilk for 2 seconds, then dredge *again* in the flour. This double-dip creates layered crispness that defies soggy-center syndrome.
Cooking – Air Fryer Method (12–14 mins)
Preheat your air fryer to 400°F (200°C). Lightly mist the basket with oil—or better yet, line it with parchment for easier cleanup. Place tenders in a single layer (work in batches; overcrowding steams them). Air fry for 6 minutes, flip, then cook 4–5 more minutes until golden and internal temp hits 165°F. Let rest 2–3 minutes before serving for juicier results.
Cooking – Deep Fry Method (6–8 mins total)
Heat 2–3 inches of vegetable or peanut oil in a heavy pot to 350°F. Carefully lower 2–3 tenders at a time using tongs—don’t crowd the pot. Fry for 2–3 minutes per side until golden brown. Drain on a wire rack over a baking sheet (not paper towels—they trap steam). Repeat until done.
6. Expert Tips for Success
Here’s what separates a *good* home cook from a crispy chicken tenders legend:
- Cold chicken = crispier crust. Take tenders out of the fridge just before dredging—if they’re too warm, the flour sticks unevenly.
- Season *in* the flour, not just on salt. The seasoned flour becomes part of the crust, not a surface dusting that washes off.
- Double-dip for drama. Yes, it seems excessive—but it creates those signature ridges and cracks that trap flavor and crunch.
- Rest before serving. Letting them sit 2–3 minutes lets steam redistribute so the inside stays juicy.
- Don’t skip the brine. Buttermilk tenderizes and adds tang—commercial kitchens use a similar process.
7. Variations & Substitutions
Gluten-Free: Swap all-purpose flour for a 1:1 GF blend + extra 1 tbsp rice flour for crispiness.
Dairy-Free: Use coconut milk or almond milk + 1 tbsp lemon juice instead of buttermilk. Let sit 5 minutes before using.
Spicy Upgrade: Add ½ tsp cayenne and 1 tsp chili powder to the flour mix—or serve with a chipotle-lime dip.
Herb Crust: Mix in 1 tbsp dried dill, parsley, or thyme to the flour blend for an herby twist.
Cooking Options: Use a hot cast-iron skillet (medium-high heat, 4–5 mins per side), oven-bake at 425°F on a wire rack (20–25 mins, flip halfway), or air fry as above.
8. Storage & Reheating
Refrigerator: Store cooled tenders in an airtight container for up to 3 days. To reheat, use an air fryer at 375°F for 3–4 minutes to restore crispness (microwave makes them rubbery!).
Freezer: Place uncoated, raw tenders on a tray and flash-freeze 1 hour. Then freeze in layers with parchment between them. When ready, fry or bake directly from frozen—add 2–3 minutes to cooking time.
Reviving Soggy Tenders? No panic! A quick blast in the air fryer (375°F for 2 minutes) will bring them back from the brink.
9. FAQ
Q: Can I use chicken breasts instead of tenders?
A: Absolutely! Cut them into 1-inch thick strips, but Pound them to uniform thickness so they cook evenly.
Q: Why are my tenders falling apart when I fry them?
A: Likely the oil’s too hot—start at 325°F to set the crust, then raise to 350°F to finish. Or you didn’t dry the chicken well before dredging—moisture = breading slippage.
Q: Can I make these dairy-free *and* gluten-free?
A: Yes! Use almond milk + lemon juice for the “buttermilk,” and a 1:1 GF blend with xanthan gum in the flour mix.
Q: How do I avoid greasy tenders?
A> Drain on a wire rack (not paper towels) and use a thermometer—overcooking dries them out, undercooking makes them greasy.
10. Conclusion
There’s nothing quite like pulling a golden, perfectly crisp homemade tenders out of the air fryer and biting into that tender, juicy center. This recipe honors the original while giving you full control—no preservatives, no mystery “vegetable oil,” just pure, satisfying flavor. Pair them with sweet tea, pickles, and your favorite dipping sauce (my go-to: honey-mustard with a splash of apple cider vinegar), and you’ve got a winner even Chick-fil-A would approve of. While you’re at it, round out your menu with a slice of ultimate moist chocolate banana bread or dump-and-go smothered pork chops for a full-on comfort-food showdown. Happy cooking—and remember: crisp is a *state of mind*.
Print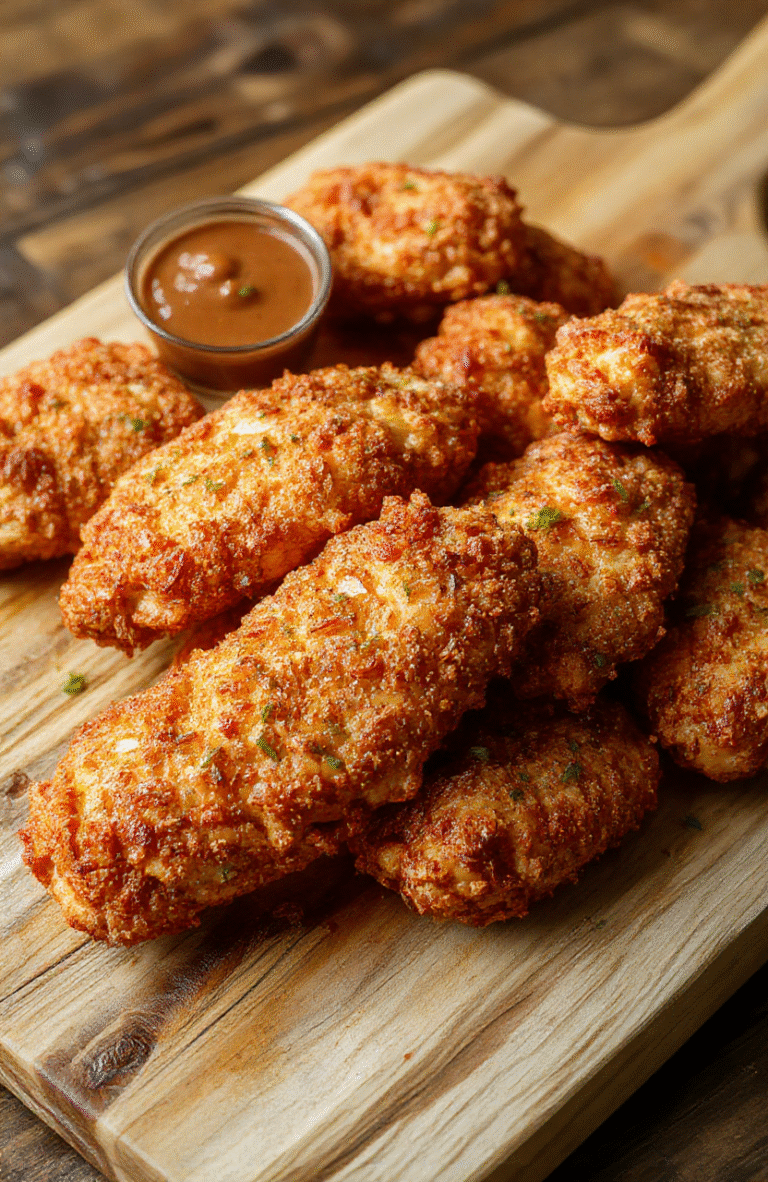
Homemade Crispy Chick Fil A Tenders
Crispy, golden-brown, restaurant-style chicken tenders made at home with simple ingredients for superior taste and crunch.
- Total Time: 30 minutes
- Yield: 4 servings
Ingredients
- 1 lb boneless, skinless chicken breasts, cut into strips
- 1 cup buttermilk
- 1 cup all-purpose flour
- 1/2 cup cornstarch
- 1 tsp baking powder
- 1 tsp salt
- 1 tsp garlic powder
- 1 tsp paprika
- 1/2 tsp black pepper
- 1/2 tsp celery seed (optional, for authentic flavor)
- 2 large eggs
- 1/4 tsp cayenne (optional)
- Vegable oil for frying
Instructions
- Place chicken strips in buttermilk and marinate for at least 30 minutes (or up to 4 hours).
- In a shallow dish, mix flour, cornstarch, baking powder, salt, garlic powder, paprika, pepper, celery seed, and cayenne.
- Beat eggs in another dish.
- Remove chicken from buttermilk, DRY well with paper towels, then dip in egg, allowing excess to drip off.
- Coat chicken thoroughly in flour mixture, pressing gently to adhere — double-dip for extra crunch: repeat egg and flour steps.
- Heat oil in a deep skillet to 350°F (175°C). Fry tenders in batches for 2.5–3 minutes per side until golden brown and internal temp reaches 165°F.
- Drain on a wire rack over a baking sheet. Serve warm with honey-mustard sauce.
Notes
- For extra crispiness, refrigerate breaded tenders for 10 minutes before frying.
- Baking option: Arrange on a wire rack over a baking sheet at 425°F for 15–18 min, flipping halfway.
- Honey-mustard sauce: Mix 3 tbsp mayonnaise, 1 tbsp Dijon mustard, 1 tbsp honey, and a squeeze of lemon.
- Prep Time: 20 minutes
- Cook Time: 10 minutes
- Method: Pan-fried
- Cuisine: American
- Diet: High Protein
Nutrition
- Serving Size: 3 tenders
- Calories: 420 Kcal
- Sugar: 2g
- Sodium: 720mg
- Fat: 21g
- Saturated Fat: 4g
- Unsaturated Fat: 14g
- Trans Fat: 0g
- Carbohydrates: 34g
- Fiber: 1g
- Protein: 32g
- Cholesterol: 95mg
