
Leprechaun Bark: A Magical St. Patrick’s Day Treat That’s Easier Than Finding a Pot of Gold 🍀✨🍫
1. Introduction
When it comes to the best St. Patrick’s Day dessert ideas, nothing captures the festive spirit quite like Leprechaun Bark. This vibrant, no-bake confection is more than just a treat – it’s an edible celebration of all things Irish! With its creamy white chocolate canvas adorned with shimmering gold and emerald green toppings, this dessert is guaranteed to be the star of your St. Paddy’s Day spread. Whether you’re hosting a lively party or simply want to surprise your family with something special, this foolproof recipe from mealsmom.com delivers maximum wow factor with minimal effort.
2. Ingredients You’ll Need
One of the best things about this recipe is how simple the ingredient list is. Here’s everything you’ll need to create this magical treat:
- 2 cups high-quality white chocolate chips (the better the chocolate, the smoother your bark will be)
- 1 teaspoon coconut oil (this secret ingredient helps create that perfect snap when you break the bark)
- Green food coloring (gel works best for vibrant color without thinning the chocolate)
- Gold sprinkles or edible gold dust (for that authentic pot-of-gold shimmer)
- Mini marshmallows (optional, but they add great texture)
- Lucky Charms cereal (optional, for extra whimsy and crunch)
- Green and gold candy melts (optional, for drizzling decorative patterns)
For those looking for more St. Patrick’s Day inspiration, check out this fantastic Leprechaun Bark variation that includes some creative twists on the classic recipe.
3. Detailed Step-by-Step Instructions
Step 1: Prepare Your Baking Sheet Like a Pro
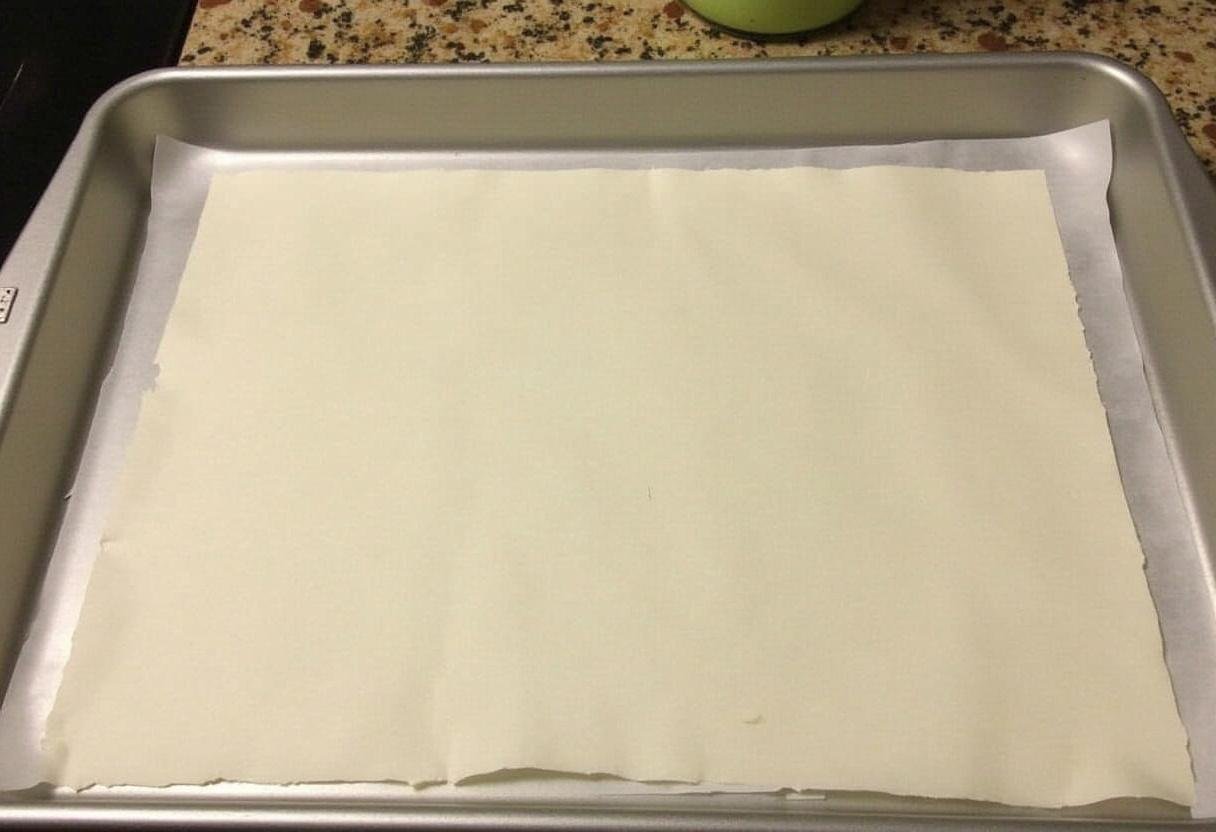
Begin by lining a standard baking sheet (about 9×13 inches) with high-quality parchment paper. The parchment should extend slightly beyond the edges for easy removal later. Pro tip: Lightly grease the baking sheet first to help the parchment stay in place while you work. This preparation step is crucial because it prevents sticking and ensures your beautiful bark comes off in perfect pieces.
Step 2: Mastering the Chocolate Melt
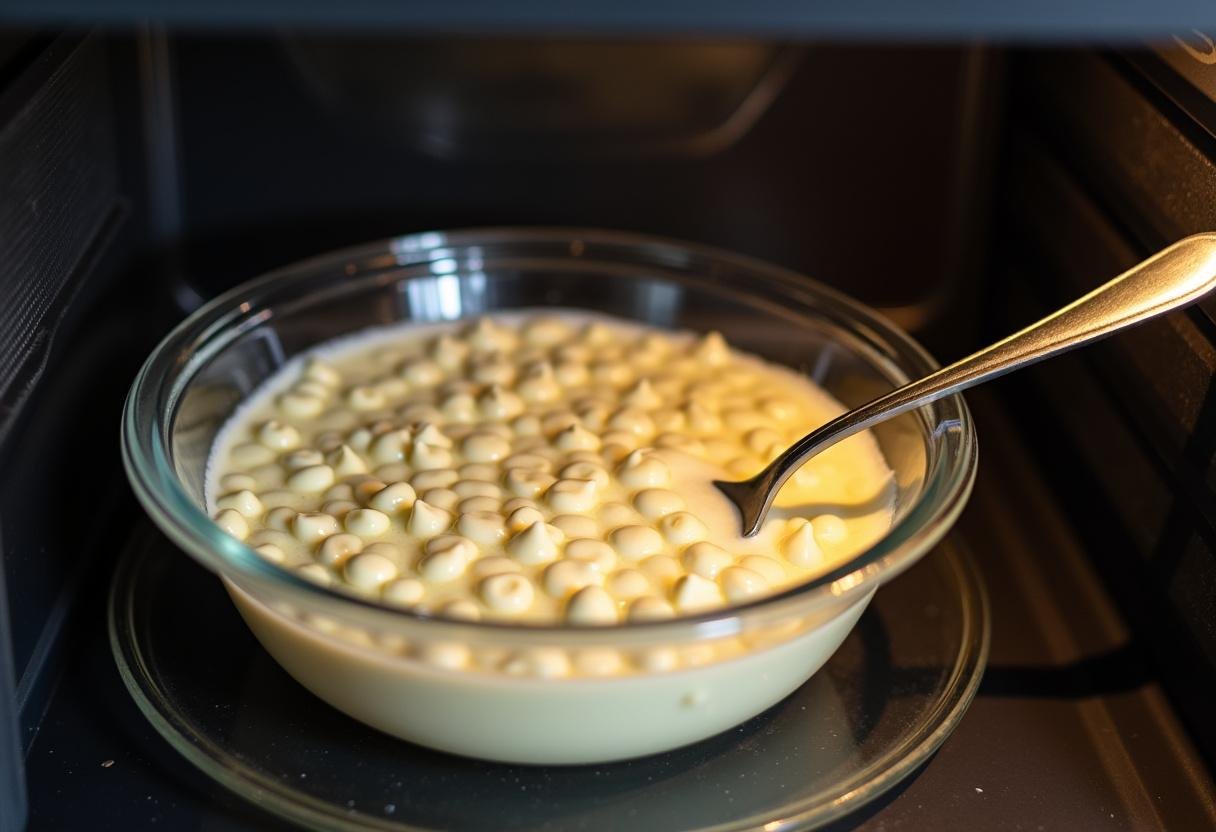
Combine your white chocolate chips and coconut oil in a microwave-safe bowl. The coconut oil isn’t just for smooth melting – it gives the finished bark a lovely sheen. Microwave in 30-second bursts, stirring vigorously between each interval. This gradual approach prevents scorching – white chocolate is notoriously temperamental! When about 90% of the chips are melted, keep stirring off-heat to melt the remaining bits. This residual heat method gives you perfect, lump-free chocolate every time.
Step 3: Creating Your Canvas
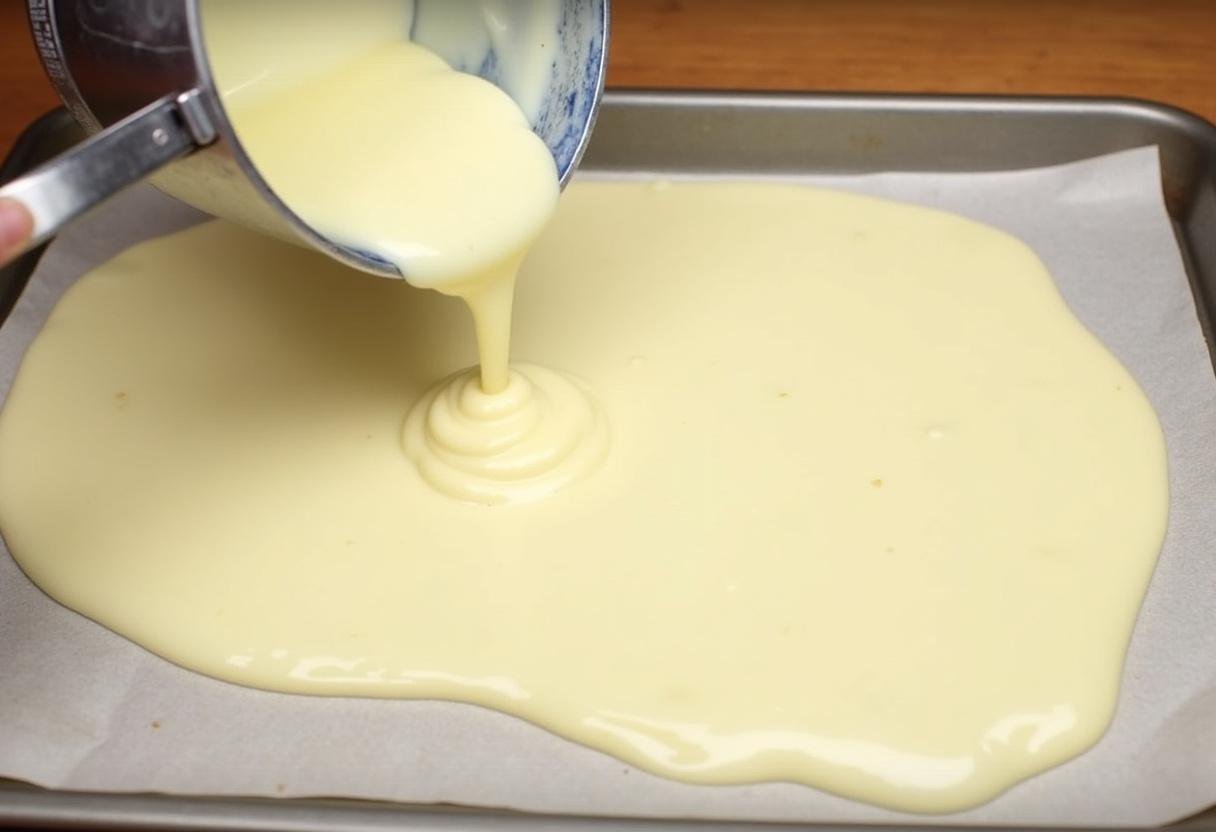
Pour the luscious melted chocolate onto your prepared sheet. Using an offset spatula or the back of a spoon, spread it to about 1/4-inch thickness. For a stunning marbled effect, add 2-3 drops of green food coloring and gently swirl with a toothpick or skewer. Don’t overmix – you want beautiful green streaks, not uniformly colored chocolate. This technique creates visual interest that makes each piece unique.
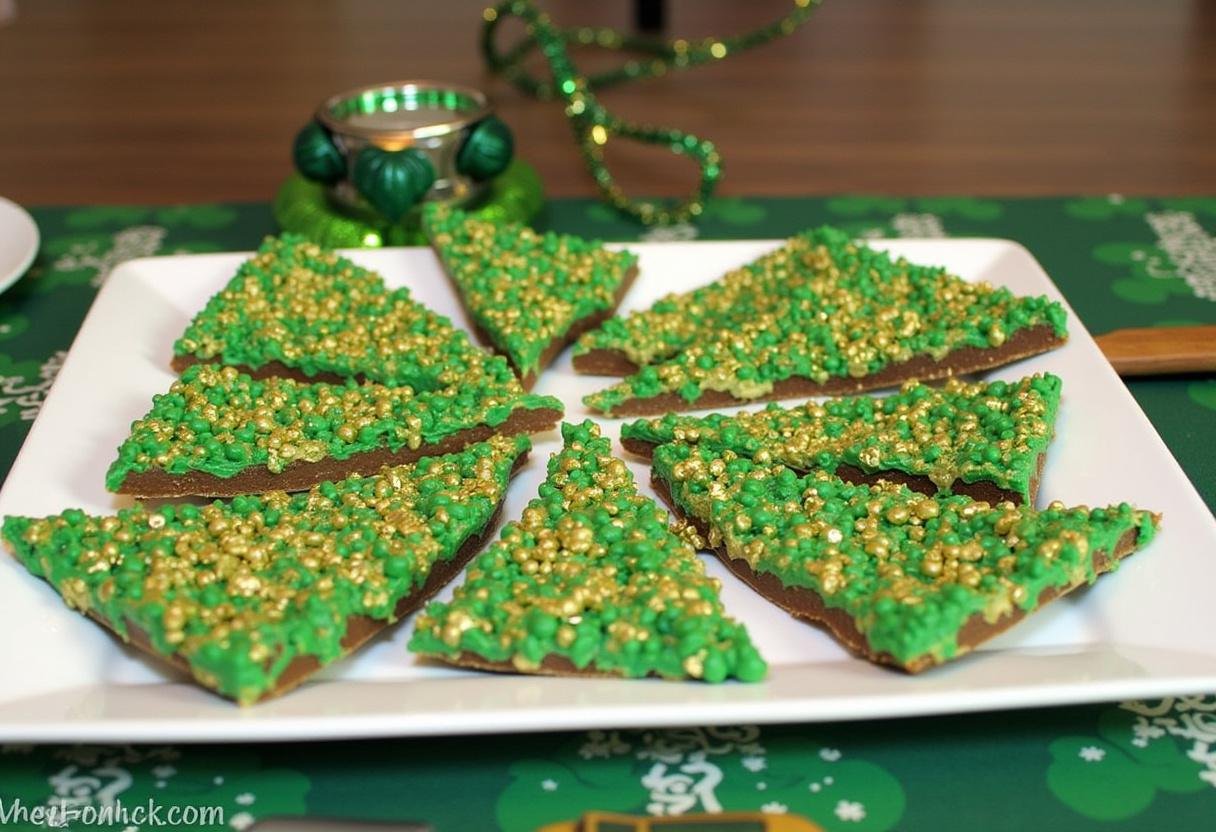
Step 4: The Fun Part – Decorating!
Now comes the creative stage where your bark truly becomes magical. Working quickly before the chocolate sets, sprinkle on your gold decorations first – they’ll sink slightly into the surface for a beautiful embedded look. Then add your marshmallows, cereal pieces, or other toppings. For professional-looking results, vary the sizes of your sprinkles and distribute them unevenly to create natural-looking clusters. The contrast between smooth chocolate and textured toppings makes each bite interesting.

4. The Waiting Game – Letting It Set Properly
Transfer your creation to the refrigerator to set. While 30 minutes is the minimum, I recommend giving it a full hour if possible. This extended chilling time ensures the chocolate fully crystallizes, giving you that satisfying snap when you break it. For best results, place it on a flat shelf where it won’t be disturbed – you don’t want any accidental fingerprints in your beautiful creation!
5. Serving Suggestions That Impress
Presentation is everything with this showstopper dessert. Consider these serving ideas:
- Arrange pieces on a tiered stand with green tissue paper between layers
- Package in clear cellophane bags tied with green ribbon as party favors
- Create a dessert board with other St. Patrick’s Day treats from mealsmom.com
- Serve alongside coffee or Irish cream hot chocolate for adults
6. Creative Variations to Try
Once you’ve mastered the basic recipe, experiment with these fun twists:
- Chocolate Lover’s Version: Use half white and half milk chocolate swirled together
- Salty-Sweet Option: Add pretzel pieces and a sprinkle of sea salt
- Nutty Irishman: Mix in chopped pistachios or almonds
- Adult Upgrade: Add a teaspoon of Irish cream flavoring to the melted chocolate
- Gluten-Free: Use gluten-free sprinkles and cereal
7. Why This Recipe Works So Well
This recipe earns its place among the best St. Patrick’s Day dessert ideas because it:
- Takes less than 15 minutes of active preparation
- Uses ingredients you can find at any grocery store
- Is completely customizable to your taste preferences
- Makes enough to feed a crowd (about 20-25 pieces)
- Can be made days in advance
- Appeals to both kids and adults
8. Frequently Asked Questions
Q: Can I use candy melts instead of white chocolate chips?
A: Absolutely! Candy melts are actually easier to work with, though they have a slightly different flavor profile. If using candy melts, you can omit the coconut oil.
Q: My chocolate seized up – can I save it?
A: Try adding another teaspoon of coconut oil and stirring vigorously. If that doesn’t work, start over – seized chocolate won’t set properly.
Q: How do I get clean breaks when portioning the bark?
A: Let it come to room temperature for 5 minutes after chilling, then use a sharp knife to score lines before breaking.
Q: Can I make this dairy-free?
A: Yes! Use dairy-free white chocolate chips and ensure all your toppings are vegan-friendly.
9. Final Thoughts
Leprechaun Bark truly is one of the best St. Patrick’s Day dessert ideas because it combines simplicity with spectacular results. Whether you’re an experienced baker or just starting out, this recipe delivers professional-looking treats that will have everyone reaching for more. The combination of creamy chocolate, crunchy toppings, and festive colors makes it irresistible. So gather your ingredients, channel your inner Irish spirit, and create some edible magic that’s sure to become a new holiday tradition in your home. After all, everyone deserves a little pot of gold at the end of their rainbow – even if it’s made of chocolate! 🍀✨
