
🍗 Sticky Brown Sugar Garlic Chicken with a Glaze You’ll Want to Spoon straight from the Pan! 🍯
1. Introduction
There’s something deeply satisfying about a dish that transforms simple pantry staples into something truly extraordinary—enter sticky brown sugar garlic chicken. This Asian-inspired comfort food hits every note: juicy tender chicken, a glossy, caramelized glaze that clings like magic, and a burst of umami from the garlic and soy blend. It’s ready in under 30 minutes, requires just one pan, and pairs beautifully with rice, roasted veggies, or even zucchini noodles for a lower-carb twist. If you’ve ever craved restaurant-worthy chicken that tastes like it came from your favorite takeout spot (but is infinitely healthier and more flavorful), this is your new weeknight hero.
2. Why You’ll Love This Recipe
- ✅ Ready in 25–30 minutes—perfect for busy weeknights without sacrificing flavor.
- ✅ One-panwonder: Minimal cleanup = maximum joy.
- ✅ One-pot meal potential: Simmer rice or quinoa alongside, or serve with steamed broccoli for a full plate.
- ✅ Kid- and guest-approved: sweet, savory, and subtly spicy—it’s crowd-pleasing comfort food.
- ✅ Versatile protein base: Works beautifully with thighs or breasts (more on that below!).
3. Ingredient Notes
The beauty of this recipe lies in its balance. Each ingredient has a role—not just adds flavor, but builds depth and texture. Let’s breakdown the MVPs:
- Chicken thighs: I recommend boneless, skinless thighs over breasts because they stay incredibly juicy—even if you overcook them a bit. But yes, breasts work too (just don’t overcook them!).
- Light brown sugar: The moisture in brown sugar helps create that glossy, sticky finish. Light brown gives a softer caramel note; dark would be bolder and more molasses-forward—choose based on your taste.
- Fresh garlic, minced: Not optional. Pre-minced jarred garlic lacks the punch and can turn bitter when caramelized. Fresh = non-negotiable here.
- Low-sodium soy sauce: This controls saltiness while keeping the savory backbone. If you only have regular, cut back by ½ tablespoon and add salt to taste later.
- Rice vinegar: Bright, tangy, and subtle. It balances the sweetness and prevents the glaze from being cloying. Apple cider vinegar makes a decent backup in a pinch.
- Ginger, grated: Fresh is best here too—adds a citrusy zing and warmth that ties everything together.
- Sesame oil: A finishing touch only! Its delicate nuttiness gets destroyed by high heat, so stir it in at the very end.
4. Kitchen Tools You Need
While you can make this dish in any skillet, using the right tools truly elevates consistency and convenience. Here’s what I reach for every time:
For those with limited counter space or cooking indoors year-round, the Compact 6-in-1 Digital Air Fryer by Amazon Basics is a game-changer—I love it for getting crispy edges before finishing the glaze in the pan (skip the oil spritz here). If you’re building or upgrading your full kitchen, the T-fal 14-Piece Hard Anodized Nonstick Cookware Set provides flawless heat distribution and stick-resistance—critical for achieving that glossy, clingy glaze without burning.
For multi-tasking prowess, the Ninja Foodi Smart XL Indoor Grill & Air Fryer Combo lets you sear, air fry, and steam—all in one. You’ll get deep grill marks and caramelization in minutes. And for coffee loverswho want a bonus upgrade, the Breville Nespresso Vertuo Creatista Espresso & Coffee Maker pairs perfectly with a post-dinner digestif.
Pro Tip: A good nonstick skillet (minimum 12″) or cast iron is essential. If you’re building your stack, the CAROTE Premium 16pc Nonstick Cookware Set offers beautiful performance and aesthetics.
5. How to Make Sticky Brown Sugar Garlic Chicken
Let’s break it down into three intuitive phases: prep → sear & simmer → glaze & finish.
Phase 1: Prep (5 minutes)
First, cut your chicken into evenly sized bites or strips (about 1-inch thick). Pat them very dry—this ensures a proper sear, not steam. In a small bowl, whisk together 3 tbsp brown sugar, 2 tbsp soy sauce, 1 tbsp rice vinegar, 2 minced garlic cloves, 1 tsp grated ginger, and 1 tsp sesame oil (reserve the rest for finishing).
Pro move: Marinate for 10–15 minutes while you prep your sides—no need to wait hours for flavor penetration in a quick recipe like this.
Phase 2: Sear & Simmer (12–15 minutes)
Heat a nonstick or cast iron skillet over medium-high. Add 1 tbsp avocado or grapeseed oil. Once shimmering, add chicken in a single layer (don’t crowd it!). Sear for 3–4 minutes per side, until golden brown and cooked through (internal temp 165°F).
Remove the chicken and set aside. Keep the drippings in the pan! Pour in your reserved marinade—now it’s safe because the sugar was added after raw contact. Bring to a gentle simmer, stirring constantly, until the mixture thickens and becomes syrupy (2–3 minutes). This is where the sticky part really happens.
Phase 3: Glaze & Finish (3 minutes)
Return chicken to the pan, toss to coat in the glossy glaze. Remove from heat and finish with a drizzle of the reserved ½ tbsp sesame oil and a sprinkle of toasted sesame seeds and sliced green onions. Serve immediately with steamed rice or veggies.
6. Expert Tips for Success
- Dry chicken = better sear. Pat thighs or breasts absolutely dry before seasoning and cooking.
- Don’t skip the simmer. Letting the marinade thicken in the pan (after removing chicken) creates the sticky coating—that’s the magic sauce.
- Low & slow for breasts. If using chicken breasts, reduce cooking time by 1–2 minutes per side to avoid dryness. Consider pounding them to even thickness.
- Watch the sugar. Brown sugar burns easily. Keep the heat at medium or medium-low during the simmer to prevent bitterness.
- Rest before slicing. Let the chicken sit for 2–3 minutes after glazing—this locks in juices and gives you cleaner cuts.
7. Variations & Substitutions
Gluten-Free: Swap soy sauce for tamari or coconut aminos.
Low-Sugar / Keto-Friendly: Replace brown sugar with 2 tbsp monk fruit allulose blend and add ¼ tsp molasses for depth.
Extra Protein: Add shelled edamame or chickpeas in the last 2 minutes of simmering.
Spicy Twist: Add ½ tsp red pepper flakes to the marinade or a drizzle of sriracha after cooking.
Veggie-Packed Version: Toss in sliced bell peppers, broccolini, or snap peas during the last 3 minutes of cooking.
8. Storage & Reheating
Store leftovers in an airtight container in the fridge for up to 3 days. The glaze will thicken and harden—this is normal.
Reheat in a skillet over low heat with 1 tsp water or broth to gently revive the sauce. Avoid microwaving uncovered or it’ll dry out.
For optimal texture, keep sauces and toppings separate until reheating. Toasted sesame seeds lose their crunch in storage—add them fresh.
9. FAQ
Can I make this ahead?
Yes! Prep the marinade and cut the chicken up to 24 hours in advance. Store separately in the fridge. Cook right before serving for best texture.
Why did my glaze turn bitter?
If the sauce darkens too much or smells acrid, the sugar likely burned. Always use low-medium heat when reducing the glaze—and never leave it unattended!
Can I use frozen chicken?
Thawed, yes. Frozen chicken will release too much water and prevent proper browning. If using frozen, thaw in the fridge overnight and pat extra-dry before cooking.
10. Conclusion
When it comes to weeknight dinners, sticky brown sugar garlic chicken delivers big on flavor, speed, and versatility—all while keeping cleanup simple. It’s the kind of dish that earns bonus hugs from picky eaters and admiration from foodie friends. Pair it with a crisp salad or serve it over jasmine rice with a splash of lime, and you’ve got a restaurant-worthy moment in under half an hour.
Craving more? Dive into our Sweet & Spicy Honey Pepper Chicken for more glaze-love, or try our Dump-and-Go Smothered Pork Chops for ultimate comfort.
Print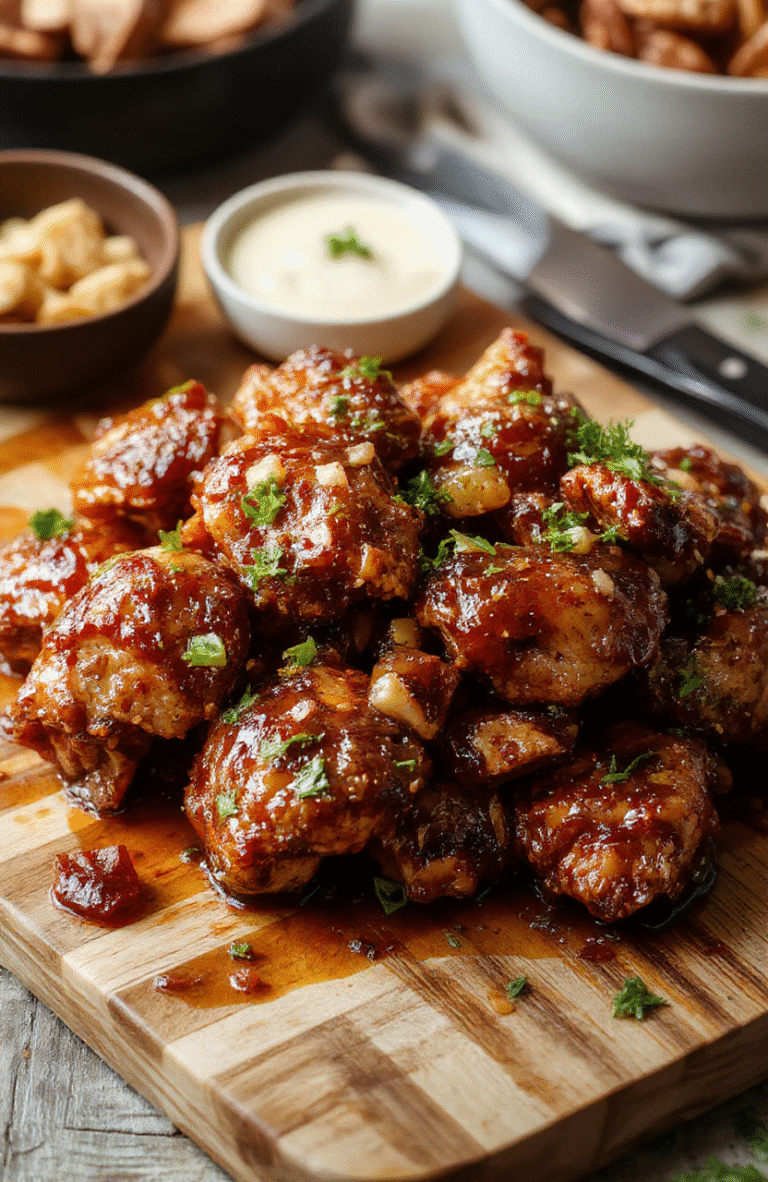
Sticky Brown Sugar Garlic Chicken
Tender brown sugar garlic chicken glazed to perfection — sweet, sticky, and packed with umami.
- Total Time: 30 minutes
- Yield: 4 servings
Ingredients
- 1.5 lbs boneless, skinless chicken thighs
- 2 tbsp olive oil
- 3 cloves garlic, minced
- 3 tbsp brown sugar
- 2 tbsp soy sauce
- 1 tbsp rice vinegar
- 1 tsp sesame oil
- ½ tsp red pepper flakes (optional)
- 2 tbsp water
- 2 scallions, sliced
- steamed rice, for serving
Instructions
- pounded chicken thighs to even thickness; pat dry.
- Heat oil in oven-safe skillet over medium-high heat. Sear chicken 4–5 mins per side until golden; remove.
- In same pan, whisk garlic, brown sugar, soy sauce, rice vinegar, sesame oil, red pepper flakes, and water. Bring to simmer.
- Return chicken to skillet, spoon glaze over. Transfer to 400°F oven 10–12 mins until internal temp reaches 165°F.
- Serve over rice, garnished with scallions.
Notes
- For extra crisp skin, use chicken thighs with skin-on and reduce oven time by 2 mins.
- Double the glaze if you prefer extra saucy dish.
- Goes well with steamed broccoli or bok choy.
- Prep Time: 10 minutes
- Cook Time: 20 minutes
- Method: Pan-sear and bake
- Cuisine: Asian-inspired
- Diet: None specified
Nutrition
- Serving Size: 1 thigh (about 140g)
- Calories: 265 Kcal
- Sugar: 12g
- Sodium: 520mg
- Fat: 10g
- Saturated Fat: 2g
- Unsaturated Fat: 6g
- Trans Fat: 0g
- Carbohydrates: 18g
- Fiber: 1g
- Protein: 24g
- Cholesterol: 85mg
