
🔥 Sweet & Spicy Honey Pepper Chicken with a Glazed Crust You’ll Crave!
1. Introduction
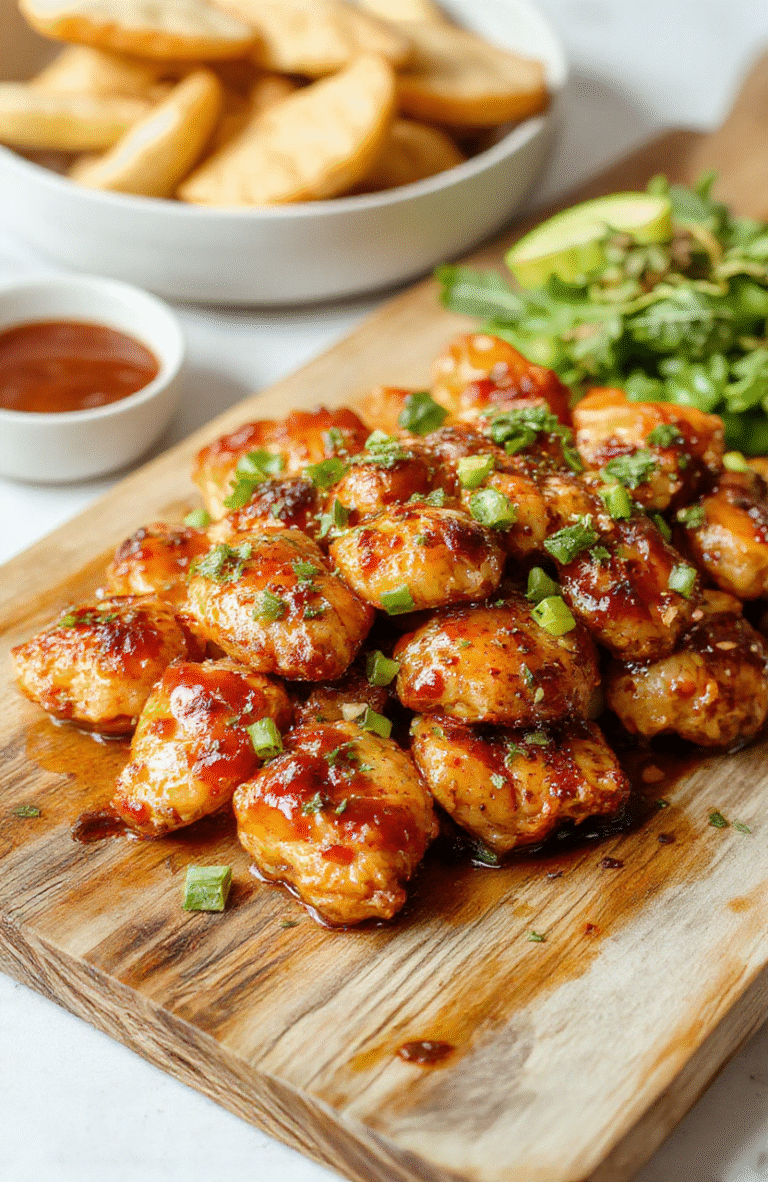
If you’re craving a dish that delivers bold flavor in every bite—crispy edges, tender chicken, and a sticky, glossy glaze that clings like magic—this honey pepper chicken is your next kitchen star. It’s the perfect balance of sweet, spicy, and savory, with just a whisper of garlic and ginger to lift the whole dish. I’ve tested this recipe over and over until the glaze hit that ideal amber finish without burning, and the chicken stayed impossibly juicy every single time. Whether you’re meal prepping for the week or impressing guests on a weeknight, this sweet and spicy chicken is a guaranteed winner.
2. Why You’ll Love This Recipe
- Ready in under 30 minutes—perfect for busy weeknights when dinner can’t wait.
- One-pan or air fryer ready—minimal cleanup with maximum reward.
- Balanced flavors—not too sweet, not too hot. The honey glaze caramelizes beautifully, while the black pepper and crushed red pepper flakes add a subtle kick.
- Versatile pairing—delightful over steamed rice, roasted veggies, or even nestled in warm tortillas for honey-pepper chicken tacos.
3. Ingredient Notes
Quality makes all the difference here. Start with boneless, skinless chicken thighs (not breasts)—they’re more forgiving and stay juicy even if you overcook them by a minute. For the glaze, organic raw honey gives a floral depth that supermarket blends can’t match. Use freshly ground black pepper—it’s aromatic and sharper than pre-ground. I recommending adding a dash of ginger powder (or freshly grated) to cut through the richness, and a splash of soy sauce (or tamari for gluten-free) to boost umami. Don’t skip the cornstarch slurry—it’s the secret to that sticky, restaurant-quality coating that clings to the chicken instead of pooling at the bottom of the pan.
4. Kitchen Tools You Need
To make this dish foolproof and efficient, a reliable air fryer or stovetop pan set is essential. For crispy, even glazing without stirring constantly, I swear by the Ninja Air Fryer Pro Crisp & Roast 4-in-1—it circulates heat so well that the chicken develops a perfect caramelized crust in just 15 minutes. If you prefer stovetop, an all-in-one cookware set like the T-fal 14-Piece Hard Anodized Nonstick Cookware Set ensures even heating and effortless cleanup. And for those who love multitasking in the kitchen, the Ninja Foodi Smart XL Indoor Grill & Air Fryer Combo is a game-changer—it grills, air fries, and roasts with convection precision. (Bonus: Use the grill function for extra char before finishing in the air fryer for maximum flavor!)
Finally, keep the honey jar and spice bins organized with the CAROTE Premium 16pc Nonstick Cookware Set, and store leftovers in the JoyJolt Airtight Glass Food Storage Set for freshness that lasts.
5. How to Make Sweet and Spicy Honey Pepper Chicken
Phase 1: Prep & Marinate (5 minutes + 10 minutes rest)
Cut 1.5 lbs of chicken thighs into bite-sized pieces. In a bowl, toss chicken with 1 tablespoon cornstarch, ½ teaspoon salt, and ¼ teaspoon black pepper. Let sit 10 minutes—this locks in moisture and helps the glaze adhere later. Meanwhile, whisk together 3 tablespoons honey, 2 tablespoons soy sauce, 1 tablespoon rice vinegar, 1 teaspoon crushed red pepper flakes, 1 teaspoon freshly ground black pepper, 1 minced garlic clove, and ½ teaspoon ginger powder (or 1 tsp grated fresh ginger).
Phase 2: Sear & Glaze (15 minutes)
Heat 1 tablespoon avocado oil in a large skillet or air fryer basket over medium-high heat. Add chicken in a single layer—don’t crowd the pan! Sear for 3–4 minutes per side until golden brown. Pour in half the glaze and simmer for 2–3 minutes, stirring until the sauce thickens and coats the chicken. For extra gloss, bring the remaining glaze to a simmer in a small saucepan and stir in a cornstarch slurry (1 tsp cornstarch + 1 tbsp water). Drizzle over the chicken and toss to coat.
Phase 3: Finish & Serve
Garnish with sliced green onions, toasted sesame seeds, and extra black pepper. Serve immediately over jasmine rice or steamed bok choy.
Optional Air Fryer Method
After marinating, air fry at 400°F for 10 minutes, flip, and cook 6–8 more minutes until internal temp hits 165°F. Toss with warmed glaze just before serving.
6. Expert Tips for Success
Don’t over-reduce the glaze on the stove—it thickens as it cools, so remove it from heat when slightly runnier than desired. Use a meat thermometer to avoid overcooking chicken thighs (aim for 160–165°F—they’ll continue cooking off-heat). For extra spice depth, add a splash of Sriracha or gochujang to the glaze. And if you want that authentic wok-hei (breath of the wok) flavor, finish the dish under the broiler for 1–2 minutes—just watch closely!
7. Variations & Substitutions
Vegetarian: Swap chicken forextra-firm tofu or tempeh cubes. Press tofu for 20 minutes first, then follow same marinade/glaze method.
Low-Sugar: Replace honey with monk fruit maple syrup or allulose syrup.
Nut-Free & Dairy-Free: This recipe is naturally compliant—but double-check soy sauce (use tamari if needed).
Extra Crunch: Roll the cornstarch-tossed chicken in panko before air frying for a crispy exterior.
8. Storage & Reheating
Store in an airtight container in the fridge for up to 4 days. Reheat in a skillet over medium heat with a splash of water or broth to revive the glaze—avoid microwaving it dry, or the chicken may seize. For best texture, reheat in the air fryer at 375°F for 4–5 minutes. Freezing works too: freeze single servings for up to 3 months. Thaw overnight in the fridge and reheat gently.
9. FAQ
Q: Can I use chicken breast instead of thighs?
A: Absolutely—but monitor closely! Chicken breast dries out faster. Reduce cooking time by 2–3 minutes and finish with a drizzle of olive oil after glazing to retain moisture.
Q: Why did my glaze turn gritty?
A: Likely due to sugar crystallization. Always dissolve honey in warm liquid *before* adding acidic ingredients (like vinegar), and avoid stirring once the glaze starts boiling. Whisk gently in a circular motion.
Q: Is this dish kid-friendly?
A: Yes! The heat level is mild ( thanks to balanced sweet and savory notes), and kids love the sticky, glossy finish. Omit the red pepper flakes for little ones.
Q: Can I make this ahead for meal prep?
A: Yes! Cook and glaze up to 2 days ahead. Store separately—toss just before serving so the chicken stays crisp.
10. Conclusion
This honey pepper chicken delivers restaurant-level flavor with minimal effort—and that glossy, spicy-sweet glaze? Absolutely irresistible. Whether you’re serving it over rice, in lettuce wraps, or as an appetizer (pair with our favorite Super Bowl apps), it’s a dish that impresses every time. Want more one-pan wonders? Try our Dump-and-Go Smothered Pork Chops or Easy Buffalo Chicken Sliders next. Let me know how your batch turns out in the comments—I read every one! Print
Sweet and Spicy Honey Pepper Chicken
This easy weeknight chicken dish combines sweet honey, garlic, ginger, soy sauce, and a kick of heat for a flavor-packed dinner. Ready in under 30 minutes!
- Total Time: 30 minutes
- Yield: 4 servings
Ingredients
- 1.5 lb boneless, skinless chicken thighs, cut into bite-sized pieces
- 2 tbsp vegetable oil
- 3 cloves garlic, minced
- 1 tbsp fresh ginger, grated
- 3 tbsp honey
- 2 tbsp soy sauce (or tamari for GF)
- 1 tbsp rice vinegar
- 1 tsp sriracha or chili garlic sauce
- 1/2 tsp black pepper
- 1 red bell pepper, sliced
- 1 small zucchini, sliced
- Sesame seeds and chopped cilantro for garnish
Instructions
- Season chicken pieces with black pepper.
- Heat oil in a large skillet over medium-high heat. Add chicken and cook 5–6 minutes until golden brown. Remove and set aside.
- In the same skillet, add garlic and ginger, sauté 30 seconds until fragrant.
- Stir in honey, soy sauce, rice vinegar, and sriracha. Bring to a simmer.
- Add chicken back to the skillet, toss to coat in sauce. Cook 2 minutes.
- Add bell peppers and zucchini, cook 3–4 minutes until crisp-tender.
- Garnish with sesame seeds and cilantro before serving.
Notes
- For extra crispiness, broil for 2 minutes after saucing.
- Gluten-free option: use tamari instead of soy sauce.
- Meal prep friendly—stores well in fridge for up to 4 days.
- Prep Time: 10 minutes
- Cook Time: 20 minutes
- Method: Stovetop
- Cuisine: Asian-inspired
Nutrition
- Serving Size: 1 cup chicken with vegetables
- Calories: 320 Kcal
- Sugar: 18g
- Sodium: 620mg
- Fat: 12g
- Saturated Fat: 2.5g
- Unsaturated Fat: 8g
- Trans Fat: 0g
- Carbohydrates: 24g
- Fiber: 3g
- Protein: 28g
- Cholesterol: 75mg
